Category Archives: Linux / Ubuntu

Increase OS Disk Size of an Azure Linux VM

If you try to expand the disk without stopping/de-allocating the VM, depending on disk config it may not allow your to change the size and a banner with message “Changes to the disk size can be made only when the disk is unattached or the managing virtual machine(s) are deallocated.” would be displayed. To increase the disk size of a Linux VM, you can perform the following:

In my environment, the VM OS disk size was smaller than 4TB and could not be resized using the online method that could be done without downtime(it requires some special configuration which I didnt really get deep into). This method will involve shutting down the VM, de-allocating the VM, increasing the disk and then bringing the disk back online. So, there would be some downtime.
Another thing:

Note: Replace text in blue with your environment specific values.

1. Stop the VM:

az vm stop –resource-group Resource-Group-Name –name VM-NAME –subscription SUBSCRIPTION-ID

2. De-allocate the VM: (This may take a few minutes)

az vm deallocate –resource-group Resource-Group-Name –name VM-NAME –subscription SUBSCRIPTION-ID

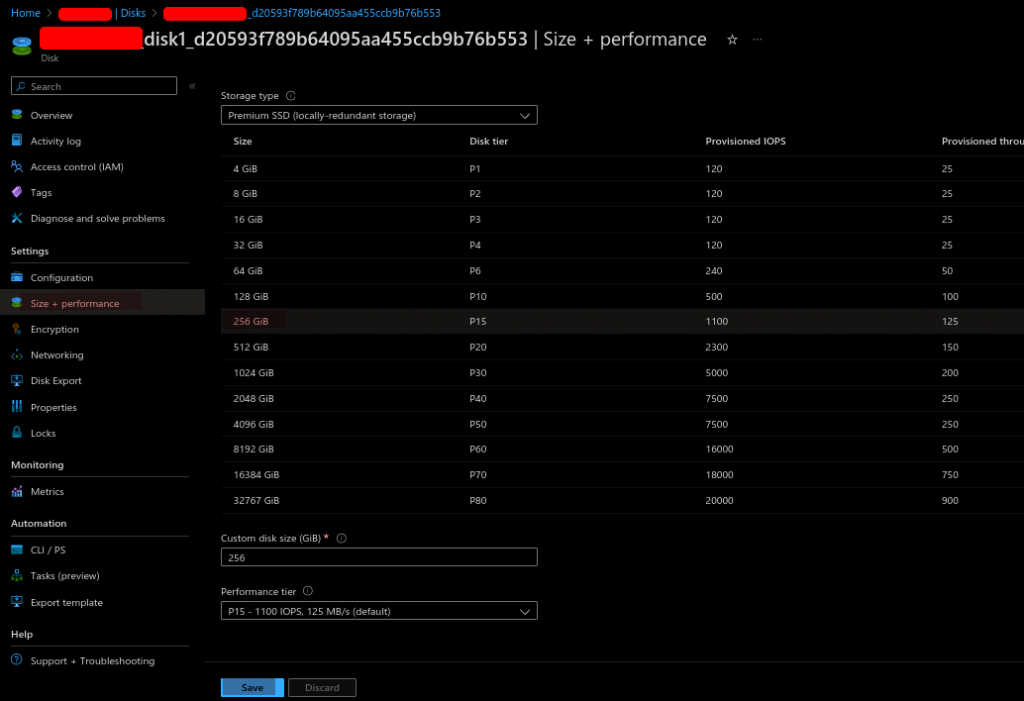
3. Increase the Disk (from the UI):

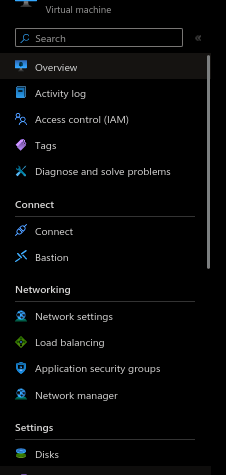
-Navigate to the VM in Azure. Click on “Disks”


-Select the disk that you need to resize.


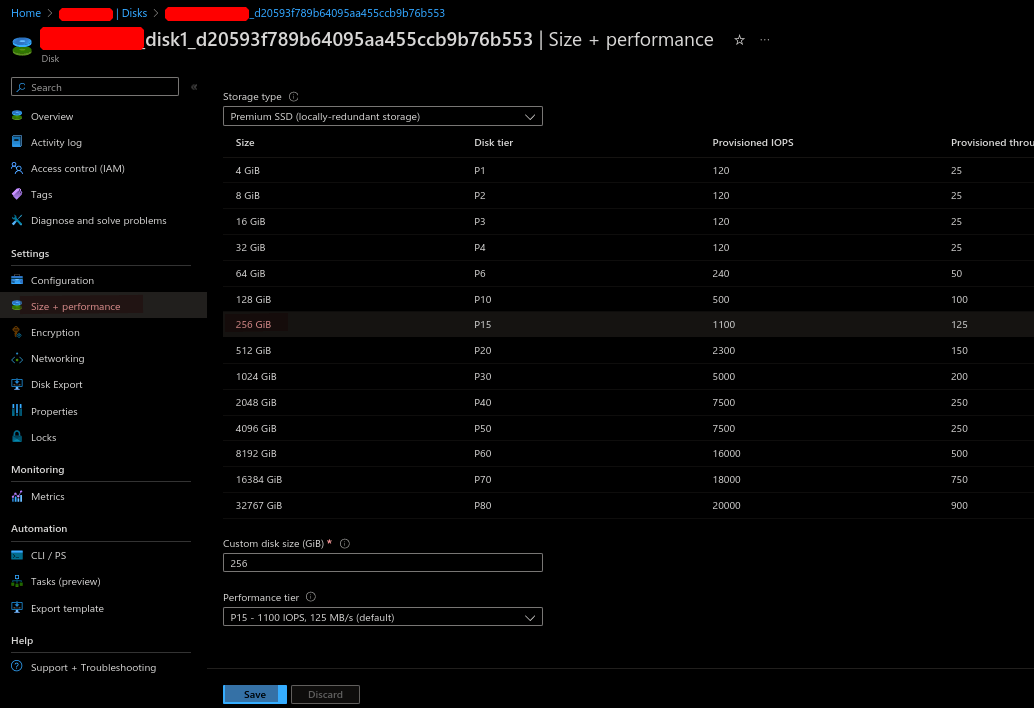
Click on “Size + performance” and select the disk size to which you want to increase to and then click on “Save”

4. Start the VM:

az vm start –resource-group Resource-Group-Name –name VM-NAME –subscription SUBSCRIPTION-ID

My Azure VM was based on Ubuntu 20.04.x and did not need additional changes in the OS. After the VM booted backup, it did automatically expand to the new allocated size.

Some of my thoughts on Azure Naming and resizing:
For some wierd reason, Azure does not make things easy for resizing disks. Ideally, you should be able to shutdown the VM and increase the disk, BUT Azure needs you to de-allocate the VM before you can make any changes to the disk. Another strange thing Azure decided to do is to label “de-allocate VM” instead of some sane label as at first it sound as if going to delete the VM and all its data when when in reality it does not.

Sources/References:
https://learn.microsoft.com/en-us/azure/virtual-machines/linux/expand-disks?tabs=ubuntu

If you have any queries/feedback regarding this, feel free to leave a comment below and will get back to you as soon as I can.

Enable promiscuous mode in VMware Workstation

Below are the steps to enable promiscuous mode for a VM in Vmware Workstation.

Shutdown the VM and edit the .vmx file. This is in the directory where your VM’s hard disks were configured to be sure.

vim /home/extr3me/vmware/pfsense/pfsense.vmx

Tip:
You can right click on the VM and select option “Open VM Directory” that will take you to the directory where the .vmx file is located.

Add the below line to the file:

ethernet0.noPromisc = "FALSE"

-If you have multiple interfaces, then add another line and replace the value 0 with 1 etc. Below is an example for two interfaces:

ethernet0.noPromisc = "FALSE"
ethernet1.noPromisc = "FALSE"

Source/Credits/Reference:

https://superuser.com/questions/1209497/how-do-you-enable-promiscuous-mode-in-vmware-workstation#1270695

Setup Wireguard VPN Server and Client in Ubuntu 20.04

This a guide on how to setup Wireguard VPN on Ubuntu and setting up a Wireguard client.

Requirements:

1. Ubuntu Server 20.04 used in my lab. (20.04 or higher is required for Policy routing)

2. Ubuntu Client (Ubuntu 20.04)

3. Root access to the server.

4. Network Access

Note: This should also work on Linux Mint 20.04

Setting up the Wireguard Server

Login to the In my lab, I have set up a EC2 instance and below is the current IP configuration before setting up Wireguard.

root@ip-172-31-20-229:~# ip a
1: lo: <LOOPBACK,UP,LOWER_UP> mtu 65536 qdisc noqueue state UNKNOWN group default qlen 1000
    link/loopback 00:00:00:00:00:00 brd 00:00:00:00:00:00
    inet 127.0.0.1/8 scope host lo
       valid_lft forever preferred_lft forever
    inet6 ::1/128 scope host 
       valid_lft forever preferred_lft forever
2: eth0: <BROADCAST,MULTICAST,UP,LOWER_UP> mtu 9001 qdisc fq_codel state UP group default qlen 1000
    link/ether 02:ca:92:5f:0e:80 brd ff:ff:ff:ff:ff:ff
    inet 172.31.20.229/20 brd 172.31.31.255 scope global dynamic eth0
       valid_lft 2617sec preferred_lft 2617sec
    inet6 fe80::ca:92ff:fe5f:e80/64 scope link 
       valid_lft forever preferred_lft forever

From above, I have a single interface with IP 172.31.20.229 assigned to eth0.

sudo apt update && sudo apt upgrade -y
sudo apt install wireguard -y

-Switch to root and run the following:

sudo su –

Below are the default permissions on the wireguard dir:

root@ip-172-31-20-229:~# ls -l /etc/ | grep wireguard
drwx------ 2 root root       4096 Aug  4  2020 wireguard

-You could set permissions to the directory as follows:

chmod 0700 /etc/wireguard/
root@ip-172-31-20-229:~# ls -l /etc/ | grep wireguard
drwx------ 2 root root       4096 Aug  4  2020 wireguard

To check the version of Wireguard installed:

root@ip-172-31-20-229:/etc/wireguard# wg --version
wireguard-tools v1.0.20200513 - https://git.zx2c4.com/wireguard-tools/

-Generate public and private key pairs:

cd /etc/wireguard/
umask 077; wg genkey | tee privatekey | wg pubkey > publickey

This should generate the private and the public key:

root@ip-172-31-20-229:/etc/wireguard# ls -l
total 8
-rw------- 1 root root 45 Jun 30 20:23 privatekey
-rw------- 1 root root 45 Jun 30 20:23 publickey

-Take a note of the private key “privatekeycat privatekey . You will need to add this to the WG server’s conf file.

Setting up the Wireguard Server’s configuration file

vim /etc/wireguard/wg0.conf

Add below content. (Here, I chose the IP as 192.168.6.1 which is the new VPN private address that will be assigned to the interface)

[Interface]
## My VPN server private IP address ##
Address = 192.168.6.1
 
## My VPN server port ##
ListenPort = 41194
 
## VPN server's private key i.e. string from /etc/wireguard/privatekey ##
PrivateKey = ADD_PRIVATE_KEY_HERE

-Allow the port in the Server’s Firewall:

root@ip-172-31-20-229:~# sudo ufw allow 41194/udp
Rules updated
Rules updated (v6)

-To check the status:

sudo ufw status

– Enable wireguard service on boot on the server and start the service:

ubuntu@ip-172-31-20-229:~$ sudo systemctl enable wg-quick@wg0
Created symlink /etc/systemd/system/multi-user.target.wants/[email protected] → /lib/systemd/system/[email protected].

ubuntu@ip-172-31-20-229:~$ sudo systemctl start wg-quick@wg0

To check the status of the wireguard service, use the following:

root@ip-172-31-20-229:~# sudo systemctl status wg-quick@wg0
[email protected] - WireGuard via wg-quick(8) for wg0
     Loaded: loaded (/lib/systemd/system/[email protected]; enabled; vendor preset: enabled)
     Active: active (exited) since Thu 2022-06-30 21:29:01 UTC; 8min ago
       Docs: man:wg-quick(8)
             man:wg(8)
             https://www.wireguard.com/
             https://www.wireguard.com/quickstart/
             https://git.zx2c4.com/wireguard-tools/about/src/man/wg-quick.8
             https://git.zx2c4.com/wireguard-tools/about/src/man/wg.8
    Process: 2230 ExecStart=/usr/bin/wg-quick up wg0 (code=exited, status=0/SUCCESS)
   Main PID: 2230 (code=exited, status=0/SUCCESS)

Jun 30 21:29:01 ip-172-31-20-229 systemd[1]: [email protected]: Succeeded.
Jun 30 21:29:01 ip-172-31-20-229 systemd[1]: Stopped WireGuard via wg-quick(8) for wg0.
Jun 30 21:29:01 ip-172-31-20-229 systemd[1]: Starting WireGuard via wg-quick(8) for wg0...
Jun 30 21:29:01 ip-172-31-20-229 wg-quick[2230]: [#] ip link add wg0 type wireguard
Jun 30 21:29:01 ip-172-31-20-229 wg-quick[2230]: [#] wg setconf wg0 /dev/fd/63
Jun 30 21:29:01 ip-172-31-20-229 wg-quick[2230]: [#] ip -4 address add 192.168.6.1/24 dev wg0
Jun 30 21:29:01 ip-172-31-20-229 wg-quick[2230]: [#] ip link set mtu 8921 up dev wg0
Jun 30 21:29:01 ip-172-31-20-229 systemd[1]: Finished WireGuard via wg-quick(8) for wg0.

Checking the ifconfig output, you would see a new interface wg0 is created automatically which is expected.

root@ip-172-31-20-229:~# ip a
1: lo: <LOOPBACK,UP,LOWER_UP> mtu 65536 qdisc noqueue state UNKNOWN group default qlen 1000
    link/loopback 00:00:00:00:00:00 brd 00:00:00:00:00:00
    inet 127.0.0.1/8 scope host lo
       valid_lft forever preferred_lft forever
    inet6 ::1/128 scope host 
       valid_lft forever preferred_lft forever
2: eth0: <BROADCAST,MULTICAST,UP,LOWER_UP> mtu 9001 qdisc fq_codel state UP group default qlen 1000
    link/ether 02:ca:92:5f:0e:80 brd ff:ff:ff:ff:ff:ff
    inet 172.31.20.229/20 brd 172.31.31.255 scope global dynamic eth0
       valid_lft 2235sec preferred_lft 2235sec
    inet6 fe80::ca:92ff:fe5f:e80/64 scope link 
       valid_lft forever preferred_lft forever
5: wg0: <POINTOPOINT,NOARP,UP,LOWER_UP> mtu 8921 qdisc noqueue state UNKNOWN group default qlen 1000
    link/none 
    inet 192.168.6.1/24 scope global wg0
       valid_lft forever preferred_lft forever

– You can check wireguard information/stats using the below command:

ubuntu@ip-172-31-20-229:~$ sudo wg
interface: wg0
  public key: pHrkGojLiNZy2GwshmdEXMaaOmowXXXXXXXXXXXXXXX=
  private key: (hidden)
  listening port: 41194

Configuring the VPN Client

  • Login to the client and install Wireguard.
sudo apt install wireguard -y

– Create the configuration file

root@wg-client:~# sudo sh -c 'umask 077; touch /etc/wireguard/wg0.conf'

root@wg-client:~# ls -l /etc/wireguard/wg0.conf 
-rw------- 1 root root 0 Jun 30 20:58 /etc/wireguard/wg0.conf
  • Create a key pair in the client

– In the client machine, create a key pair:

root@wg-client:~# cd /etc/wireguard/

root@wg-client:/etc/wireguard# umask 077; wg genkey | tee privatekey | wg pubkey > publickey

root@wg-client:/etc/wireguard# ls -l 
total 8
-rw------- 1 root root 45 Jun 30 21:01 privatekey
-rw------- 1 root root 45 Jun 30 21:01 publickey
-rw------- 1 root root  0 Jun 30 20:58 wg0.conf
root@wg-client:/etc/wireguard# 

– Take a note of the client’s public key. (This will be added in the server’s config later)

-Take a note of the private key from the client. This will be added in its own config file.

cat privatekey
  • Edit config

vim /etc/wireguard/wg0.conf

– On the client, create the wireguard config file as below:

[Interface]
## Add the client's private key which is from /etc/wireguard/publickey ##
PrivateKey = CLIENT_PRIVATE_KEY_HERE
 
## Client ip address that will be set by this Client ##
Address = 192.168.6.2/24
  
[Peer]
## Ubuntu 20.04 server public key ##
PublicKey = SERVER_PUBLIC_KEY_HERE
 
## set ACL ##
AllowedIPs = 192.168.2.0/24
  
## Your Ubuntu 20.04 LTS server's public IPv4/IPv6 address and port ##
Endpoint = PUBLIC_IP_OF_YOUR_WIREGUARD_SERVER:41194
   
##  Key connection alive ##
PersistentKeepalive = 15

-On the client, enable and start the Wireguard service:

root@wg-client:/etc/wireguard# sudo systemctl enable wg-quick@wg0
Created symlink /etc/systemd/system/multi-user.target.wants/[email protected] -> /lib/systemd/system/[email protected].

root@wg-client:/etc/wireguard# sudo systemctl start wg-quick@wg0

– Check the status of the service in the client:

root@wg-client:~# sudo systemctl status wg-quick@wg0
* [email protected] - WireGuard via wg-quick(8) for wg0
     Loaded: loaded (/lib/systemd/system/[email protected]; enabled; vendor preset: enabled)
     Active: active (exited) since Thu 2022-06-30 21:35:17 UTC; 5min ago
       Docs: man:wg-quick(8)
             man:wg(8)
             https://www.wireguard.com/
             https://www.wireguard.com/quickstart/
             https://git.zx2c4.com/wireguard-tools/about/src/man/wg-quick.8
             https://git.zx2c4.com/wireguard-tools/about/src/man/wg.8
    Process: 123 ExecStart=/usr/bin/wg-quick up wg0 (code=exited, status=0/SUCCESS)
   Main PID: 123 (code=exited, status=0/SUCCESS)
        CPU: 28ms

Jun 30 21:35:17 wg-client systemd[1]: Starting WireGuard via wg-quick(8) for wg0...
Jun 30 21:35:17 wg-client wg-quick[123]: [#] ip link add wg0 type wireguard
Jun 30 21:35:17 wg-client wg-quick[123]: [#] wg setconf wg0 /dev/fd/63
Jun 30 21:35:17 wg-client wg-quick[123]: [#] ip -4 address add 192.168.6.2/24 dev wg0
Jun 30 21:35:17 wg-client wg-quick[123]: [#] ip link set mtu 1420 up dev wg0
Jun 30 21:35:17 wg-client systemd[1]: Finished WireGuard via wg-quick(8) for wg0.

-From the above output, we can see that the wireguard service has created the interface wg0 and assigned the IP 192.168.6.2/24 to it. You could also verify this by checking by checking the device ip conf as below:

root@wg-client:~# ip a
1: lo: <LOOPBACK,UP,LOWER_UP> mtu 65536 qdisc noqueue state UNKNOWN group default qlen 1000
    link/loopback 00:00:00:00:00:00 brd 00:00:00:00:00:00
    inet 127.0.0.1/8 scope host lo
       valid_lft forever preferred_lft forever
    inet6 ::1/128 scope host 
       valid_lft forever preferred_lft forever
2: eth0@if114: <BROADCAST,MULTICAST,UP,LOWER_UP> mtu 1500 qdisc noqueue state UP group default qlen 1000
    link/ether aa:3c:37:57:21:8a brd ff:ff:ff:ff:ff:ff link-netnsid 0
    inet 192.168.1.143/24 brd 192.168.1.255 scope global dynamic eth0
       valid_lft 86010sec preferred_lft 86010sec
    inet6 fe80::a83c:37ff:fe57:218a/64 scope link 
       valid_lft forever preferred_lft forever
3: wg0: <POINTOPOINT,NOARP,UP,LOWER_UP> mtu 1420 qdisc noqueue state UNKNOWN group default qlen 1000
    link/none 
    inet 192.168.6.2/24 scope global wg0
       valid_lft forever preferred_lft forever

So far, we can configured the client to talk to the server. But the Server does not know about the client. So, next we need to update the Server’s Wireguard configuration file with the details of the wireguard client.

-Login to the Wireguard Server and add the below block to the server’s wireguard conf:

[Peer]
## Desktop/client VPN public key ##
PublicKey = CLIENT_PUB_KEY_HERE

## client VPN IP address (note  the /32 subnet) ##
AllowedIPs = 192.168.6.2/32

-So, your Wireguard server’s configuration file will be as follows:

[Interface]
## My VPN server private IP address ##
Address = 192.168.6.1
 
## My VPN server port ##
ListenPort = 41194
 
## VPN server's private key i.e. /etc/wireguard/privatekey ##
PrivateKey = ADD_PRIVATE_KEY_HERE

[Peer]
## Desktop/client VPN public key ##
PublicKey = CLIENT_PUB_KEY_HERE

## client VPN IP address (note  the /32 subnet) ##
AllowedIPs = 192.168.6.2/32

– Start the service again on the server:

sudo systemctl start wg-quick@wg0

Verify connectivity from the client => server:

– If the server is in the cloud, then update the security groups tallow the port.

– From the client, ping the server 192.168.6.1

root@wg-client:~# ping 192.168.6.1
PING 192.168.6.1 (192.168.6.1) 56(84) bytes of data.
64 bytes from 192.168.6.1: icmp_seq=1 ttl=64 time=81.9 ms
64 bytes from 192.168.6.1: icmp_seq=2 ttl=64 time=82.5 ms
^C
--- 192.168.6.1 ping statistics ---
2 packets transmitted, 2 received, 0% packet loss, time 1001ms
rtt min/avg/max/mdev = 81.886/82.172/82.458/0.286 ms

Checking active connections from Wireguard server:

– To see which clients are connected to the server and the statistics, you can run the below:

root@ip-172-31-20-229:~# sudo wg
interface: wg0
  public key: pHrkGojLiNZy2GwshmdEXMaaOmowXXXXXXXXXXXXXXX=
  private key: (hidden)
  listening port: 41194

peer: 8Zp7Cji5Aseew3L0P3c35sUzJNIPYYYYYYYYYYYYYYY=
  endpoint: 1.2.3.4:33395
  allowed ips: 192.168.6.2/32
  latest handshake: 1 minute, 12 seconds ago
  transfer: 3.94 KiB received, 1.47 KiB sent

Additional Information:

For debugging issue with wireguard, you could check the logs:

sudo journalctl -eu wg-quick@wg0

Here is a little cronjob to monitor the tunnel via ping and restart tunnel: (Credits to linuxbabe)

sudo crontab -e

-Add the below:

SHELL=/bin/bash
* * * * * for ((i=1; i<=6; i++)) do (ping -c9 192.168.6.1 > /dev/null || systemctl restart wg-quick@wg0) done

Hope this helps! Cheers!

Sources/References:

https://www.cyberciti.biz/faq/ubuntu-20-04-set-up-wireguard-vpn-server/

Set Up Your Own WireGuard VPN Server on Ubuntu 24.04/22.04
Install Docker on Ubuntu 18.04.1

This is a tutorial on how to install Docker on Ubuntu 18.04. [Works on Ubuntu 16.04 / 17.04 / 18.04.1 ]

Before we install docker, verify if you had installed any older versions of docker. If so, we need to remove them.

Run the following to remove any old versions of docker:

sudo apt-get remove docker docker-engine docker.io containerd runc -y

Install Prerequisites:

sudo apt-get install apt-transport-https ca-certificates curl software-properties-common -y

Install docker using convenience script

curl -fsSL get.docker.com -o get-docker.sh
sudo sh get-docker.sh

Add current user to docker group

sudo usermod -aG docker $USER

Enable Docker service on boot:

To enable docker service to run on boot, run the following:

sudo systemctl enable docker

Now, we need to exit out of the terminal and open a new terminal so that we can start using docker. Else, you may get a permission error. [You could either type “exit” and re-login to your ubuntu server or open a new terminal session].

After re-logging in, we can start using docker.

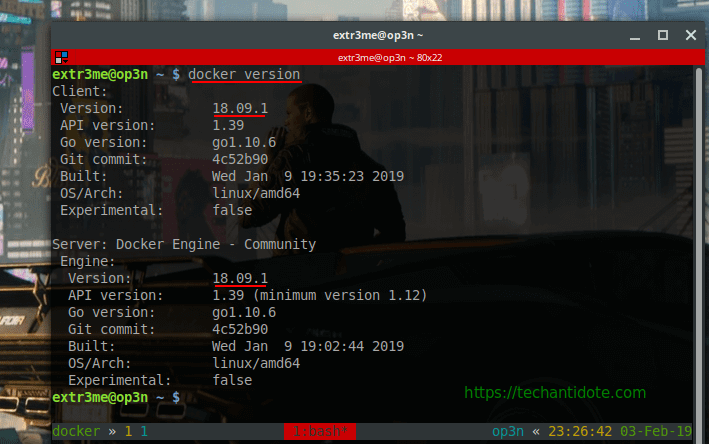
To start with, you can check the version of docker installed on your system.

docker version

Here is a screenshot of the outputs for reference:

docker version

When I got this, I’ll was like…

Now, lets run a  docker container, you can use the following:

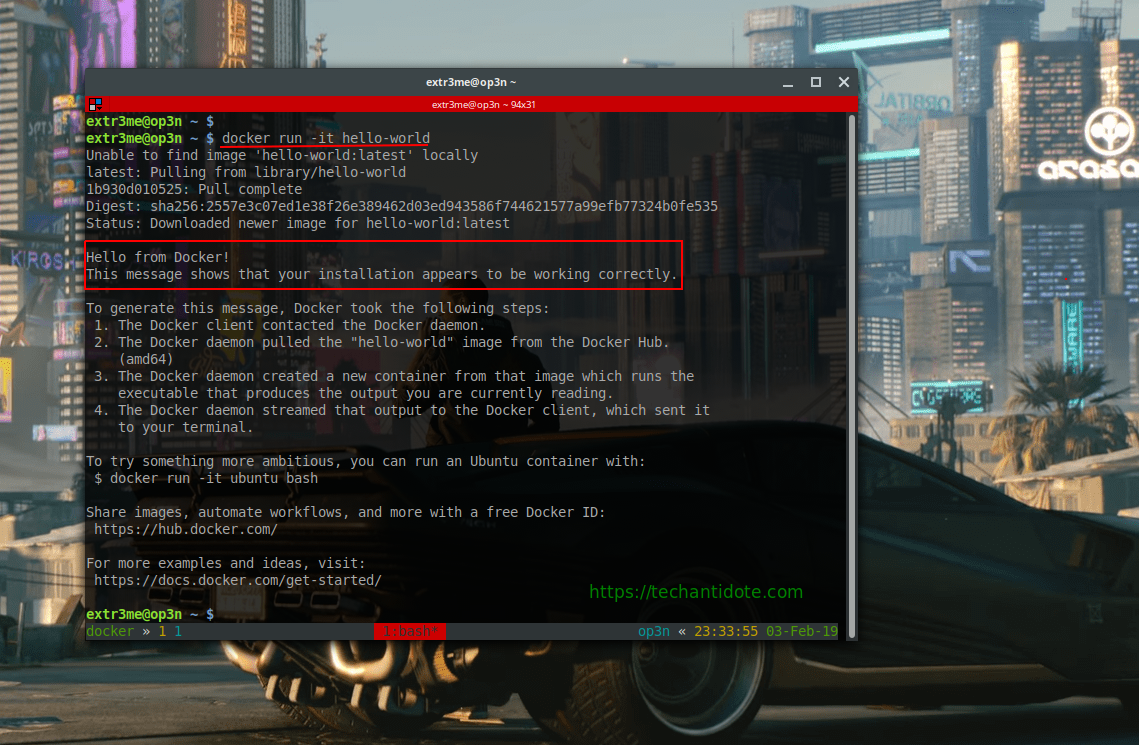
docker run -it hello-world

You should ideally see docker downloads a docker image and provide you with a hello world message as shown below:

Just kidding, you should see something outputs as below:

Thats all for this tutorial. Do Leave a comment down below if you docker installed successfully.

Do bookmark my website/follow for future docker tutorials.

#PeaceOut

References/Sources:

Docker Install

Gify

Check partition information in Linux

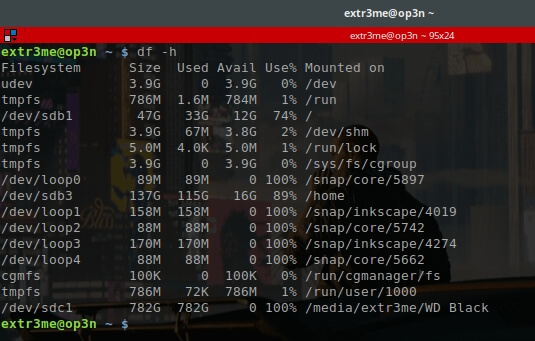
To show currently mounted partition in human readable format, use:

df -h

df -h sample output screenshot

Another way to check partition information using parted.

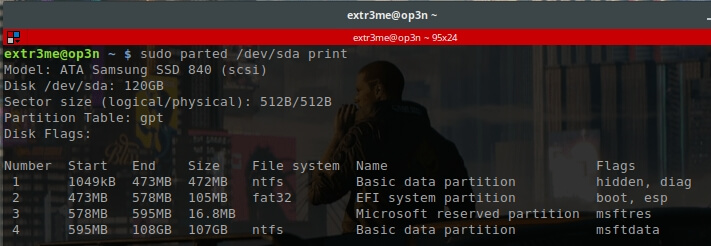
sudo parted /dev/sda print

parted sample output screenshot

Here, we can see that the disk size is 120GB along with the partition information.

To view the list of partitions using fdisk, use:

fdisk -l

To view the list of block devices:

lsblk

Hope this helps! Cheers 🙂

A Simple Bash Script for deploying an EC2 instance in AWS

Below is a sample bash script that I created to deploy an EC2 instance in AWS.

What does this script do?

-Load the at the user defined values for VPC,Subnet, Security Policy.
-Use aws cli to interact with AWS with the IAM user configured.
-Create a new AWS key named “devenv-key” and store the corresponding key in your local machine.
-Deploy an t2.micro ubuntu EC2 instance.
-Upon deployment, it will wait for 60 seconds and SSH directly into the newly deployed ubuntu ec2 instance.

Prerequisites:

-An Amazon AWS account.(Free or Paid account)
-An IAM user with Access Key and secret access key.
Pre-configured VPC, Subnets, Routes, Internet gateways, Security policy.
-Any Linux Machine with aws cli utlity installed.
[Refer to my previous blog post on how to install AWS CLI tool.]
Link: https://techantidote.com/how-to-install-aws-cli-in-linux-auto-command-completion/

– In host machine, run “aws configure” to configure your IAM user details.

[ PS: I am not a expert in scripting. ]

Variables to be set before running the script:

-I have added the following variables in the script:

"vpc_id"
"sub_id"
"route_table"
"internet_gateway"
"sec_id"
"aws_image_id"
"i_type".

-Substitute values for these variables from that of your AWS environment in the script.

How do I run the script?

Option 1: Git clone and run it

-I have setup a public project in gitlab. You can clone and run the script (You would require git to clone the project.)

git clone https://gitlab.com/techantidote/aws-bash.git
cd aws-bash

-Edit the script getaws.sh and update values for vpc_id, sub_id and sec_id.
-Once done, run the script:

./getaws.sh

Option 2:
-Create a file (getaws.sh), make it executable, copy the below contents to this file and run the script.

Bash Script starts here:

#!/bin/bash
echo -e "\e[33m ========= AWS Automation Project =========\033[0m"

#AWS variables - Modify these as per your account
# Enter your VPC ID
vpc_id="vpc-12345"

# Enter your Subnet ID.
sub_id="subnet-12345"

#Enter your route table ID - Optional
#route_table="rtb-12345"

#Enter internet gateway - Optional
#internet_gateway="igw-12345"

# Enter your security group ID
sec_id="sg-12345"

# Enter the AWS Image ID you would like to deploy. The below image ID is for an Ubuntu EC2 instance.
aws_image_id="ami-41e9c52e"

#Set the type of instance you would like. Here, I am specifying a T2 micro instance.
i_type="t2.micro"

# Create an optional tag.
tag="Wakanda"

#Create the key name what you want
aws_key_name="devenv-key"
ssh_key="devenv-key.pem"

#Generate a random id - This is optional
uid=$RANDOM

# Generate AWS Keys and store in this local box
echo "Generating key Pairs"
aws ec2 create-key-pair --key-name devenv-key --query 'KeyMaterial' --output text 2>&1 | tee $ssh_key

#Set read only access for key
echo "Setting permissions"
chmod 400 $ssh_key

echo "Creating EC2 instance in AWS"
#echo "UID $uid"

ec2_id=$(aws ec2 run-instances --image-id $aws_image_id --count 1 --instance-type $i_type --key-name $aws_key_name --security-group-ids $sec_id --subnet-id $sub_id --associate-public-ip-address --tag-specifications 'ResourceType=instance,Tags=[{Key=WatchTower,Value="$tag"},{Key=AutomatedID,Value="$uid"}]' | grep InstanceId | cut -d":" -f2 | cut -d'"' -f2)

# Log date, time, random ID
date >> logs.txt
#pwd >> logs.txt
echo $ec2_id >> logs.txt
echo ""

echo "EC2 Instance ID: $ec2_id"
#echo "Unique ID: $uid"
elastic_ip=$(aws ec2 describe-instances --instance-ids $ec2_id --query 'Reservations[0].Instances[0].PublicIpAddress' | cut -d'"' -f2)
echo -e "Elastic IP: $elastic_ip"
echo $elastic_ip >> logs.txt
echo "=====" >> logs.txt

#echo "Copy paste the following command from this machine to SSH into the AWS EC2 instance"
#echo ""
#echo -e "\e[32m ssh -i $ssh_key ubuntu@$elastic_ip\033[0m"
echo ""
countdown_timer=60
echo "Please wait while your instance is being powered on..We are trying to ssh into the EC2 instance"
echo "Copy/paste the below command to acess your EC2 instance via SSH from this machine. You may need this later"
echo ""
echo "\033[0;31m ssh -i $ssh_key ubuntu@$elastic_ip\033[0m"

temp_cnt=${countdown_timer}
while [[ ${temp_cnt} -gt 0 ]];
do
printf "\rYou have %2d second(s) remaining to hit Ctrl+C to cancel that operation!" ${temp_cnt}
sleep 1
((temp_cnt--))
done
echo ""

ssh -i $ssh_key ubuntu@$elastic_ip


Note | Disclaimer:

-I build this very basic script to learn about aws cli (Probably the hard way :P).

-There are way more easier ways to achieve the same result using templates.

-The intention of this script was to learn about AWS CLI and in the future implement methods to control to which VPC/Subnet/IG/Security policy that an EC2 instance needs to be attached on the fly.

-This is strictly to be run on test environments and not for production.

-Terminate your EC2 instance and its resources after testing so that you do not get charged. If you are using the AWS Free tier and within the trial period, you should be fine.

Do let me know your feedback (Good / Bad)in the comments section down below.

Happy Cloud computing 🙂

How to install AWS CLI in Linux + Auto command completion

This is a guide on how to install aws cli utlity in Linux along with screenshots.

Requirements:

– Linux.
– Python 2.6.5 or higher.

[Tested on Linux Mint with bash shell. should work on Ubuntu as well.]

Update your system and its packages:

sudo apt update && sudo apt upgrade -y

Install Pip:

sudo apt install python-pip -y
sudo pip install --upgrade pip

Install the following modules:

sudo pip install setuptools
sudo pip install wheel

Install AWS CLI:

sudo pip install awscli

To verify that the installation went well, you can run the following command.

aws --version

If the output shows the aws version, then you are all set.

Enable AWS commands Auto completion:

-To enable auto completion of sub commands, run the following to check where your “aws” and “aws_completer” are located.

which aws
which aws_completer

-Copy the output of “which aws_completer”. This would the path.

For example, if the output of “which aws_completer” was “/usr/local/bin/aws_completer”, then enter the following:

complete -C '/usr/local/bin/aws_completer' aws

Heres a screenshot reference:

setup aws awscli aws_completer setup for bash

Verify if AWS command auto completion works:

-Run the following command and press press TAB on your keyboard after typing “ec” and it should give you the possible options:

aws ec

aws awscli autocompletion installation on linux mint

Add path to your .bashrc or .bash_profile:

To make the changes persistant for aws command completion, you can add the following to your “.bashrc” or “.bash_profile.

echo "complete -C ‘/usr/local/bin/aws_completer’ aws" >> ~/.bashrc

Hope this helps! 🙂

Regards,
ΞXΤЯ3МΞ

Tmux not displaying bash prompt colors

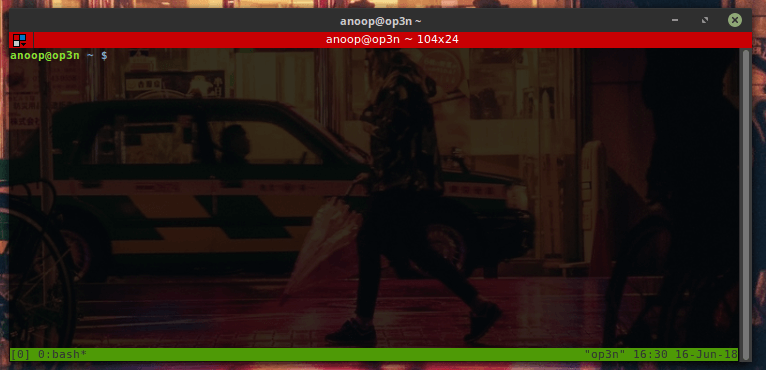
Here is a screenshot of my terminal when I open tmux:

tmux PS1 prompt before

Note: Here, my shell displays my username@hostname but it does not display it in colors  🙁

To make tmux read your bash colors, edit your tmux configuration file:

vim ~/.tmux.conf

Add the following line to the tmux config file:

set -g default-terminal "screen-256color"

Exit and save the file. Close and re-open tmux.

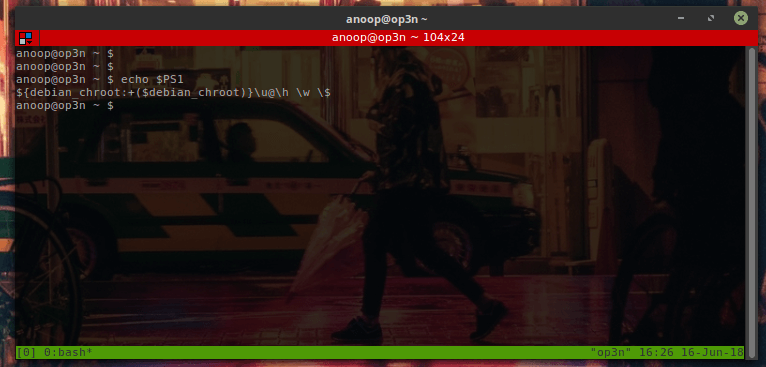
Now, when you open tmux you should be able to get your regular bash prompt colors. Here is a screenshot after re-opening tmux:


tmux $PS1 bash prompt color after modying tmux.conf

Hope this helps! Cheers!


Source: Link