How to improve WordPress load times

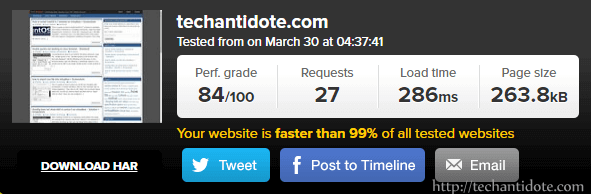
Step 1. Perform a speed test

Go to https://tools.pingdom.com and enter your website to test your current load time. This is to get a idea the load time and performance score for reference.

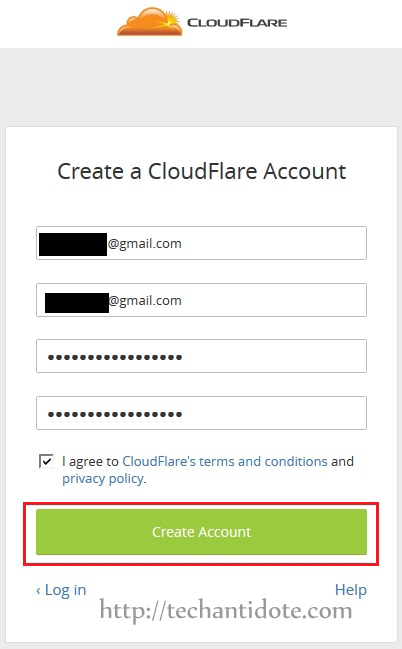
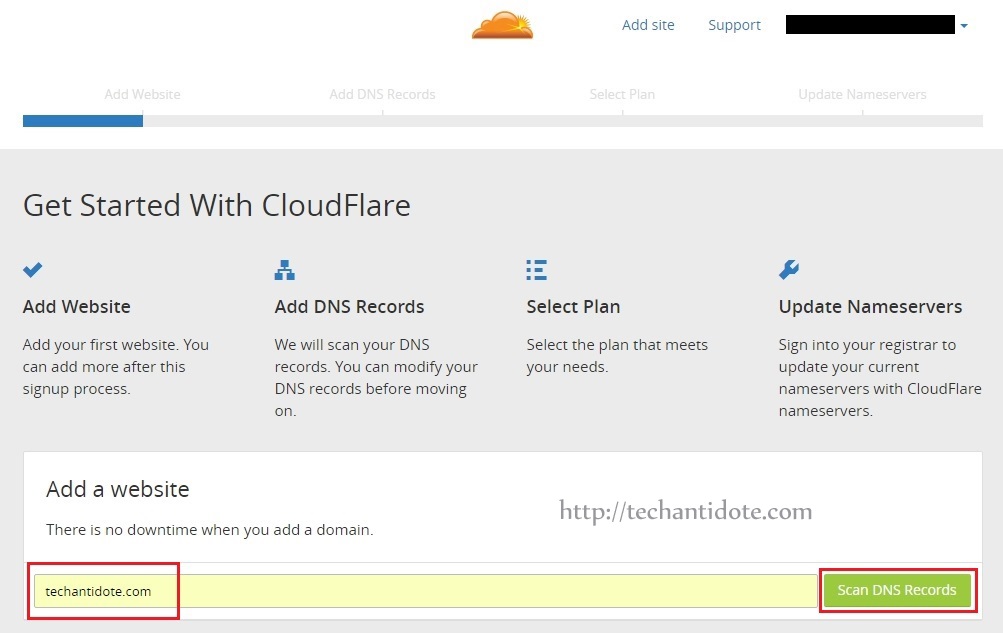
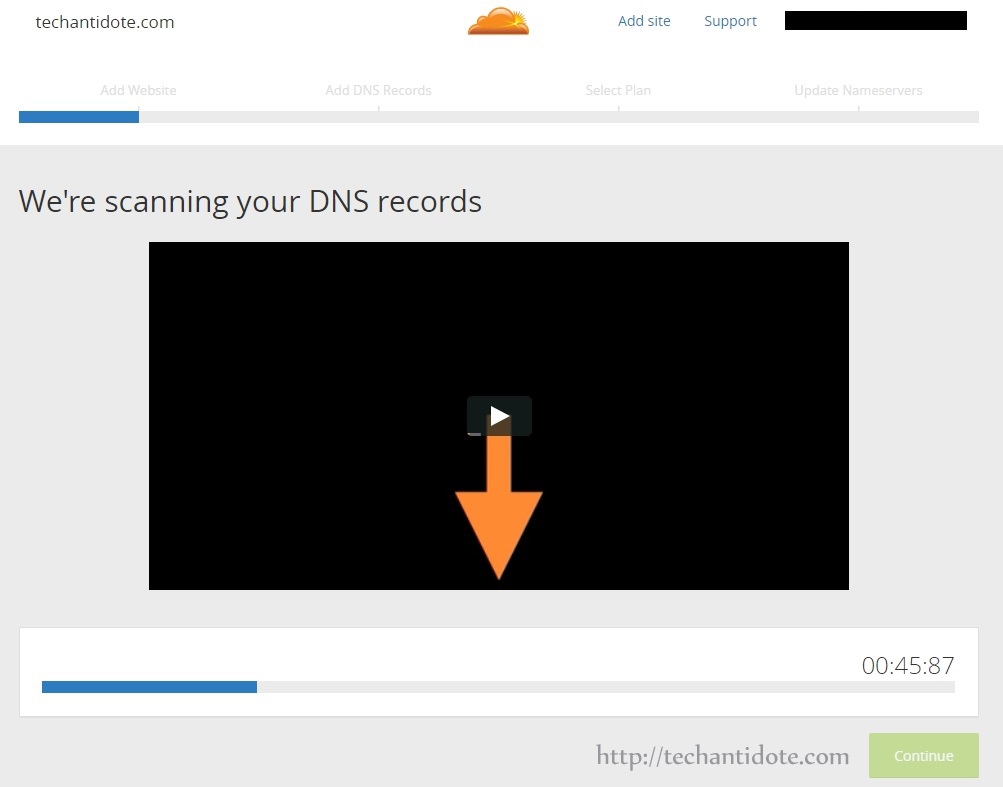
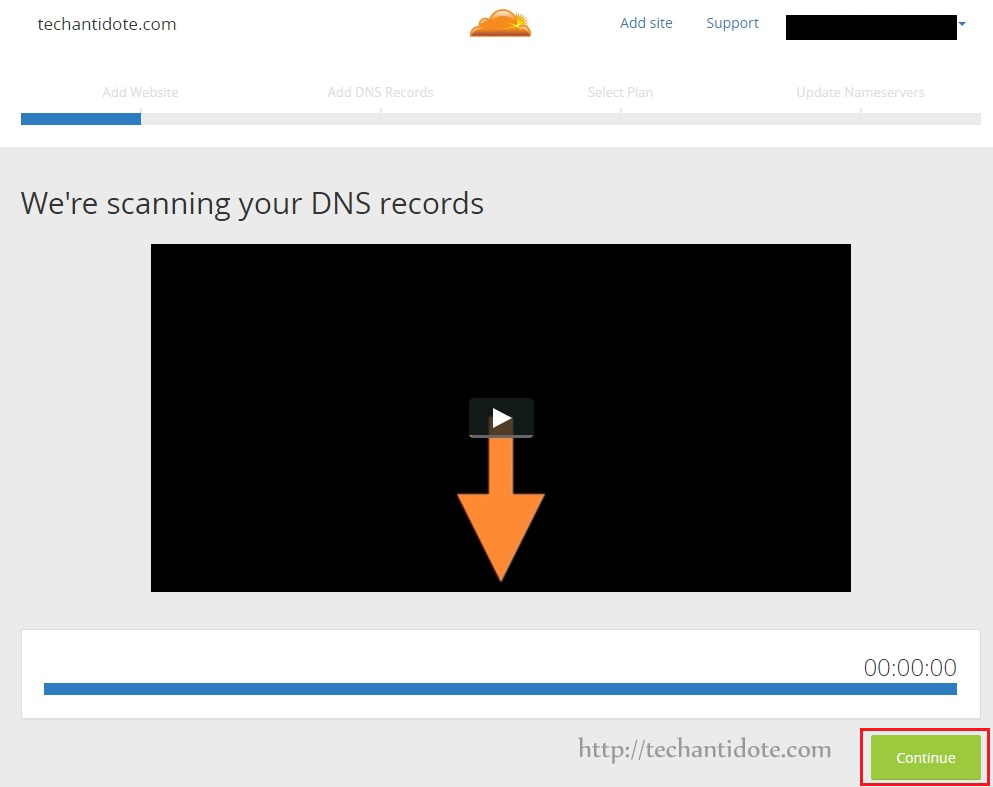
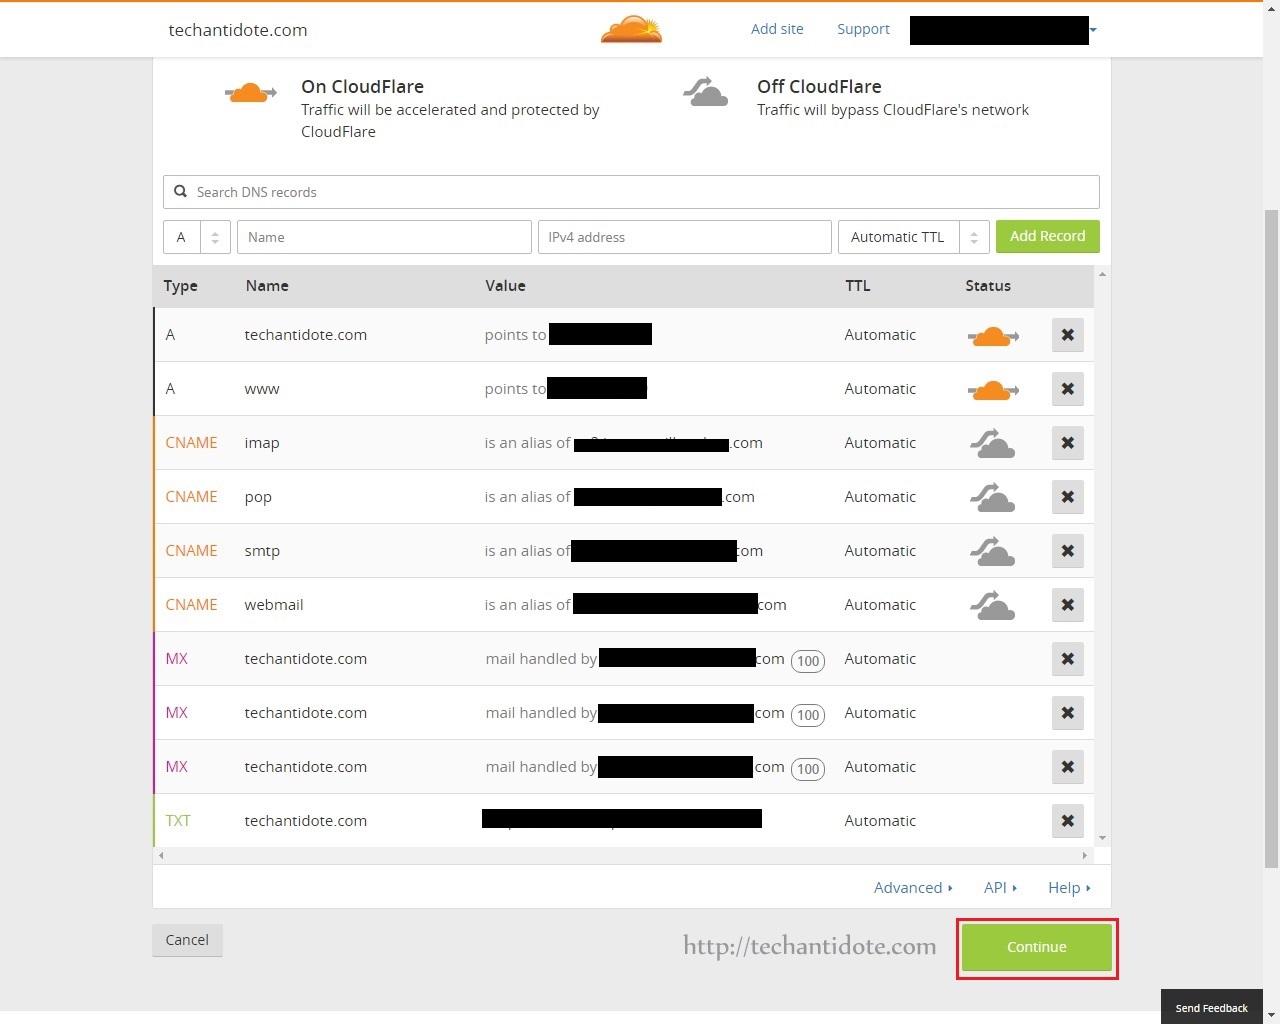
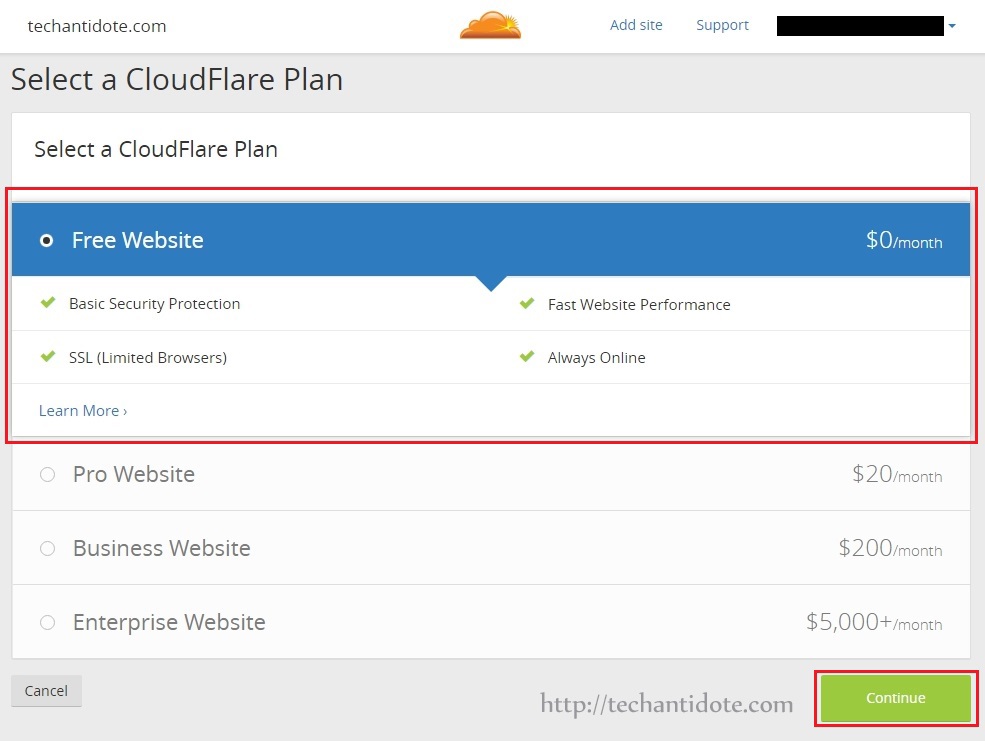
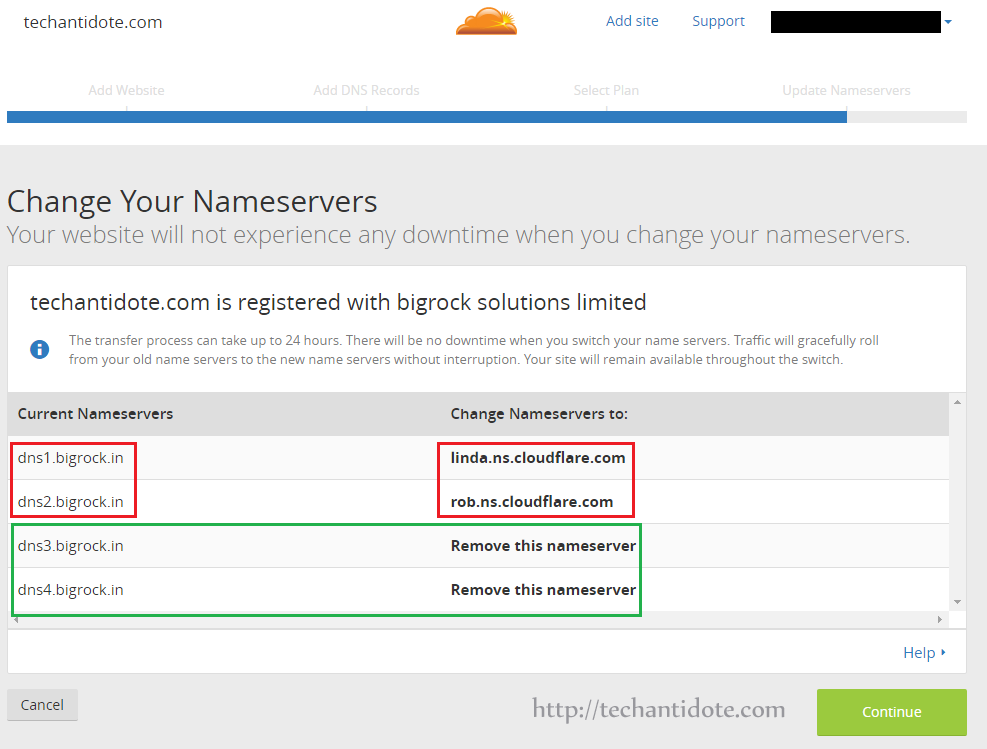
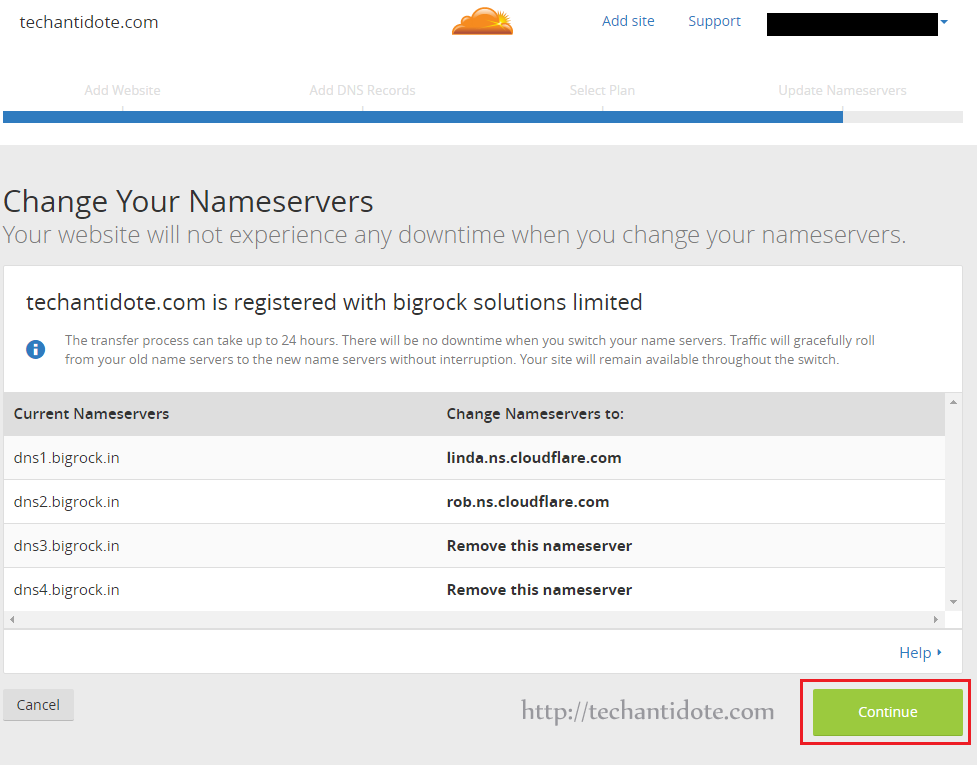
Step 2. Configure Cloudflare CDN for your wordpress

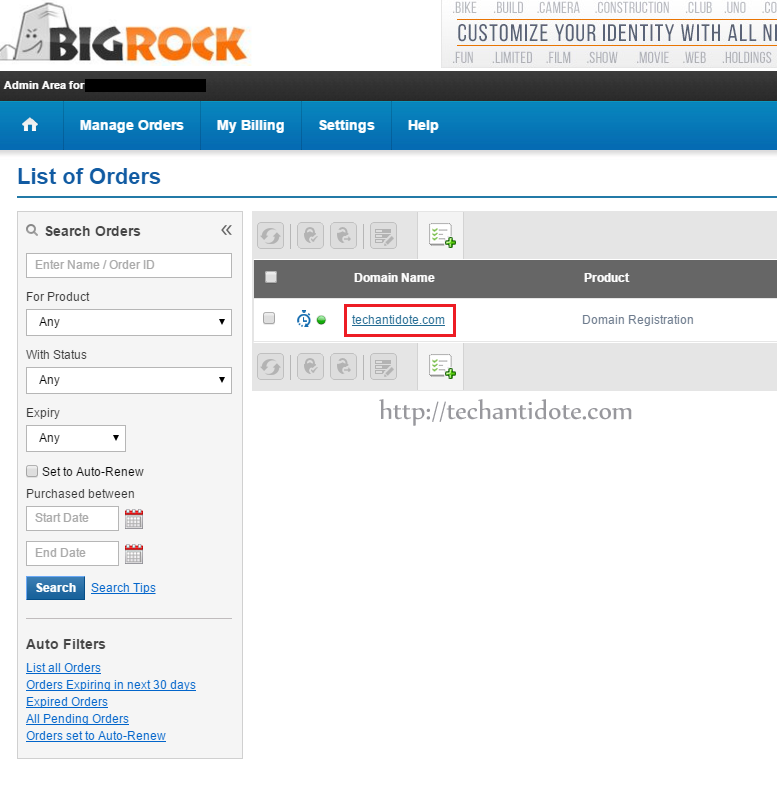
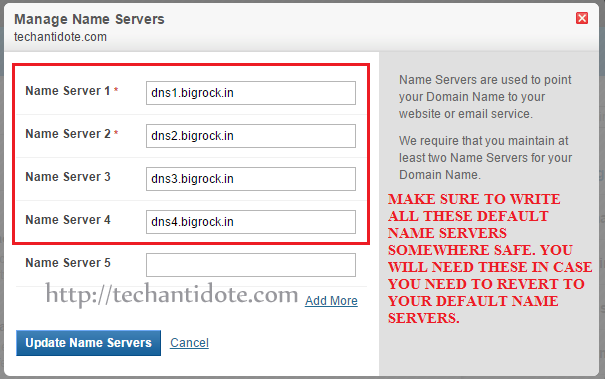
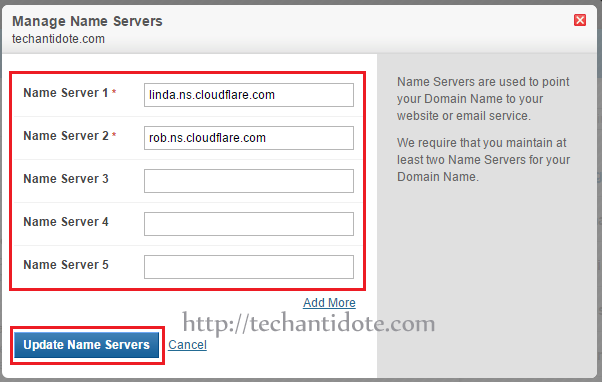
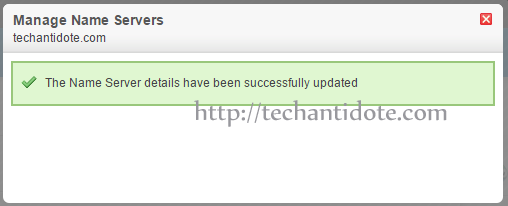
You can configure cloudflare CDN for your wordpress website for free which will reduce latency and hence improve page load speeds. Create an account at http://www.cloudflare.com and change your name servers to the ones provided by cloudflare. For a more detailed guide with screenshots on how to configure cloudflare CDN for your website, you can find it here. (Link opens in new tab)

Step 3. Optimize your images

If your wordpress blog has a ton of images, then its best you optimize them so that your blog would load faster. You can either use plugins such as ‘WP Smush‘ (Plugin Link) or “Compress JPEG & PNG images” (Plugin Link) to optimize images. You can also manually optimize it and upload them if your an expert.

I also did notice that if the image are of .PNG format, then its best to use Tiny PNG (https://tinypng.comor use their plugin “Compress JPEG & PNG images” as it is more efficient than ‘WP Smush’.

Step 4. Remove Google Fonts

If your theme loads google fonts, you may find few requests going out to the google server which can slow down your site. Disabling it is easy and all you have to do is install plugin named ‘Remove Google Fonts References.

Step 5: Disable Gravatar Hoovercards

This step is only needed if you have installed and configured Jetpack for your wordpress blog.

Go to your wordpress dashboard, click on Settings>Discussion.  Uncheck the option “View people’s profiles when you mouse over their Gravatars” next to “Gravatar Hovercards”.

If ‘Gravator Hovercards’ section is greyed out, then click on “Shows Avatars”, uncheck “View people’s profiles when you mouse over their Gravatarsand then uncheck “Shows Gravatar” and save changes.

Step 6. Remove query strings from static resources

This have a huge impact on your performance score in pingdom and Gtmetrics. I have written an article on how to remove query strings from static resources to improve load times here. (Link opens in new tab)

Step 7. Remove unwanted plugins

Like the title suggests, if you don’t use a plugin its best to remove them.

Once done, re-run the speed tests https://tools.pingdom.com to compare before and after performance results.

Sources: Link

How to remove query strings from static resources in wordpress

I ran some tests in Pindgom & found that load times could be improved. The fix was to remove query strings from static resources. Here is a screenshot before optimization:

before remove query strings from static resources - pingdom

I needed to improve the load time and the perf. grade score a bit more to improve SEO ratings.

There are many websites where you can perform a speed test of your website. I would recommend either of the following:

  1. Pingdom: http://tools.pingdom.com
  2. GTmetrix: http://gtmetrix.com

The above websites also provide a ‘Waterfall layout’ which displays the sequential order in which the elements are loaded(starting from the DNS query, the wait times, load times etc). I used pingdom instead of Gtmetrix as I was able to select the server location from which the test was being conducted which made it more flexible. Now, lets gets started!

[Disclaimer: Only attempt this if you know what you are doing and make sure you have a full backup of your website just incase something goes wrong.]

To remove query strings from static resources:

Add the following to your wordpress theme’s functions.php file and save it.

/*** Remove Query String from Static Resources ***/
function remove_cssjs_ver( $src ) {
 if( strpos( $src, '?ver=' ) )
 $src = remove_query_arg( 'ver', $src );
 return $src;
}
add_filter( 'style_loader_src', 'remove_cssjs_ver', 10, 2 );
add_filter( 'script_loader_src', 'remove_cssjs_ver', 10, 2 );

After adding the above code, I ran a speed test in pingdom to check if there was any performance improvement. As expected, the perf. grade score increased from 78/100 to 84/100 and the load time reduced to 286ms from 975ms. Yaay!!

after- remove query strings from static resources - pingdom

Also, note that if in the future you update your wordpress theme, the functions.php may also be updated/replaced. So you may need to verify and re-do this step again to make sure its persistent after the theme update.

There are plugins that do the same procedure to make things easier, but I prefer the manual way as installing a lot of plugins can slow down your website.

Have you optimized your wordpress site? Feel free to leave a comment below. Do subscribe for future updates. Happy Blogging!

[Source: Technumero, WordPress forums ]

How to setup Cloudflare CDN with Bigrock (manually) + Screenshots

This is a guide on how to setup Cloudflare CDN with BigRock (similar for Bluehost,Godaddy, Dreamhost, Hostgator) for your website or blog . You can follow the steps below:

Step 1. Create an account with Cloudflare:

Go to https://www.cloudflare.com and click on the “Signup” button.


cloudlare signup

Fill in your details, tick on “Agree” and then click on “Create Account“.

cloudflare create account

Step 2. Add your website

Now, in the text box below, type your website address and then click on “Scan DNS Records“as shown below.

cloudflare add site and scan dns

It will take a few moments for the scanning to complete.


cloudflare scanning dns records

Once, the scanning is complete, click on “Continue“.


cloudflare dns scanning complete

Now, click on “Continue” in the bottom corner:

cloudflare click continue


Step 3. Select Cloudflare Plan

Now, select the “Free Website” package as shown below and click on “Continue“.


select cloudflare free plan

Step 4. Get new name servers

Now, you will see the Cloudflare name servers as shown below. [This may vary for your website]

cloudflare name servers

As you see, for my website it is requesting to change the name server from

dns1.bigrock.in to linda.ns.cloudflare.com
dns2.bigrock.in to rob.ns.cloudflare.com

Also, also to remove the following nameservers:

dns3.bigrock.in 
dns4.bigrock.in 

[Note: The nameservers that you may see in your screen may be different.]

Step 4: Change your name servers to Cloudflare

Now, open up a new tab and login to your domain host panel (i.e. from where you bought your domain name from eg BigRock, Goddady, Hostgator, Bluehost etc). I have my domain from BigRock so I will be loggin in to my Bigrock account.

domain hosting bigrock login

Now, click on the domain you need to change the name servers to.


bigrock select domain

Now, click on “Name Servers” 


bigrock manage name servers


And you will see your default nameservers as shown below:

default bigrock name servers

Now, change your nameserver to the ones provided by cloudflare. In my case, after changing the nameserver, it will look like this:


cloudflare nameservers update

Now, click on “Update Name Servers“.

domain bigrock nameserver change success

Step 5: Verify in Cloudflare

Now, go back to your cloudflare tab and click on “Continue“.

cloudflare dns nameserver

It should show you show you a green banner with the status: “Active” as shown below.


cloudflare cdn active status[NOTE: If you the status does not show as “Active” then you can click on “Recheck Status” and it then should show that its “Active”]

[IMPORTANT: It would take about 24-48 hours for the DNS to get updated.]

And Voila! You have successfully configured Cloudflare CDN for your blog/website and should load faster.

Do check the  performance of your website after 24-48 hours and let me know in the comments sections below if there was any speed improvement.

If this article helped you, then support us by liking us  us on FacebookTwitterGoogle+ and  Tumbler. 🙂

Regards,
ΞXΤЯ3МΞ