Kali Linux slow update fix + Screenshots

After installing Kali Linux and running apt-get update if you notice slow downloads, then you could try the following to fix the issue:

Open Terminal and type the following:

vi /etc/apt/sources.list

Your sources file may look like the one below (Notice the highlighted box that indicates http):

kali linux default apt-get sources file screenshot

Now, change the text (indicated in the box) from http to repo. So, after making the changes to your mirror list(sources file), it should look like the one below:

After changing kali linux mirror screenshot

Save and close the file.

Now, run the following to verify the download speeds from the new mirrors:

apt-get clean all
apt-get update

You should notice considerable difference in running updates. Do let me know in the comments section below if this worked.

Cheers!

Regards,
ΞXΤЯ3МΞ

Source: Kali Forums – inkbird

DIY Honor 4C earpiece and Screen replacement

Finally, fixed my phone’s screen and broken earpiece. This is a continuation of my previous post (Disassembling my Honor 4C ) where I dismantled my old bae – Honor 4c and this is my first DIY phone repair.

Here is the repair log:

So, I bought the display and the touch screen digitizer from ebay and it got shipped in a week.

Honor 4c screen replacement from ebay

While trying to replace the screen, I accidentally damaged the earpiece (located on the top of the phone) as I pulled it out the wrong way.

Honor 4c earpiece (broken) picture


The red rectangle shown below is the location of the earpiece(next to the secondary camera):

Honor 4c earpiece location

Well, that didn’t go as planned 🙁

Then, I did weeks of research trying to source the earpiece for the Honor 4c online but the earpiece was not available anywhere. Finally, I found it on aliexpress for $4.53 (Link) which was a good deal (including shipping from China).

I got the earpiece delivered in 1 month. It was actually pretty fast shipping considering it was shipped from another country and cleared customs in my country which usually takes a long time. Infact, this is my first item that I purchased from China and from aliexpress.

Parcel from China

Dismantled the phone (again), fixed the earpiece, and mounted the display. And here comes the moment of truth!!!

Honor 4c is Booottttiinnnnnngg!! :D

Booot was successful. 

Tested primary and secondary camera, wifi and earpiece and it was all back to normal. 🙂

 Yaayyyy!!! 

Well, this project had its ups and downs, took long to complete but am am happy that I completed it.

Regards,

ΞXΤЯ3МΞ

How to check if a partition is primary in CentOS+Screenshots

This is a guide on how to check if a partition is primary in centos or not? Use the following command:

# parted /dev/sda print

parted /dev/sda print centos

Alternative:

# cfdisk /dev/sda

centos cfdisk sample output

As shown above, the field under “Part Type” would suggest if that partition is Primary/Secondary.

To exit out of the cfdisk menu, use your arrow keys and move the selection to “Quit” and hit Enter in your keyboard.

Source: Link

As always stay Happy! Happy Blogging! 🙂

ΞXΤЯ3МΞ

Disassembling my Honor 4C

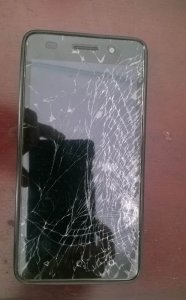
I dropped my phone while running to work and the screen broke due to the impact. I have been using this phone for a very long time (since 13th June 2015) and I dint want to let go (probably due to sentimental value). Most people would just throw the old one away and get a new one but honestly I didn’t really feel the need to get a new one. As of now, I will wait and see. Maybe eventually I might get a new one (Honor 8 Pro maybe?) but I don’t know. So I thought I would keep it with me, give it time, learn and fix it myself even thought I have no clue what I am doing. LOL! May be this whole repair thing is a bad idea and might fail, but its definitely worth a shot.

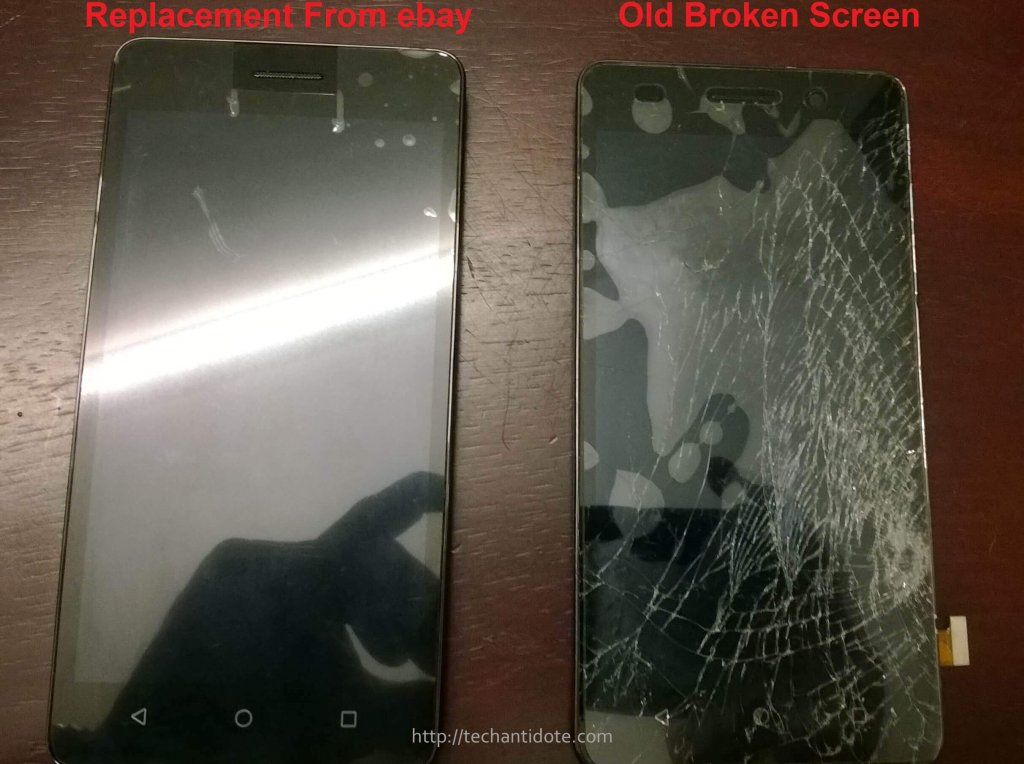
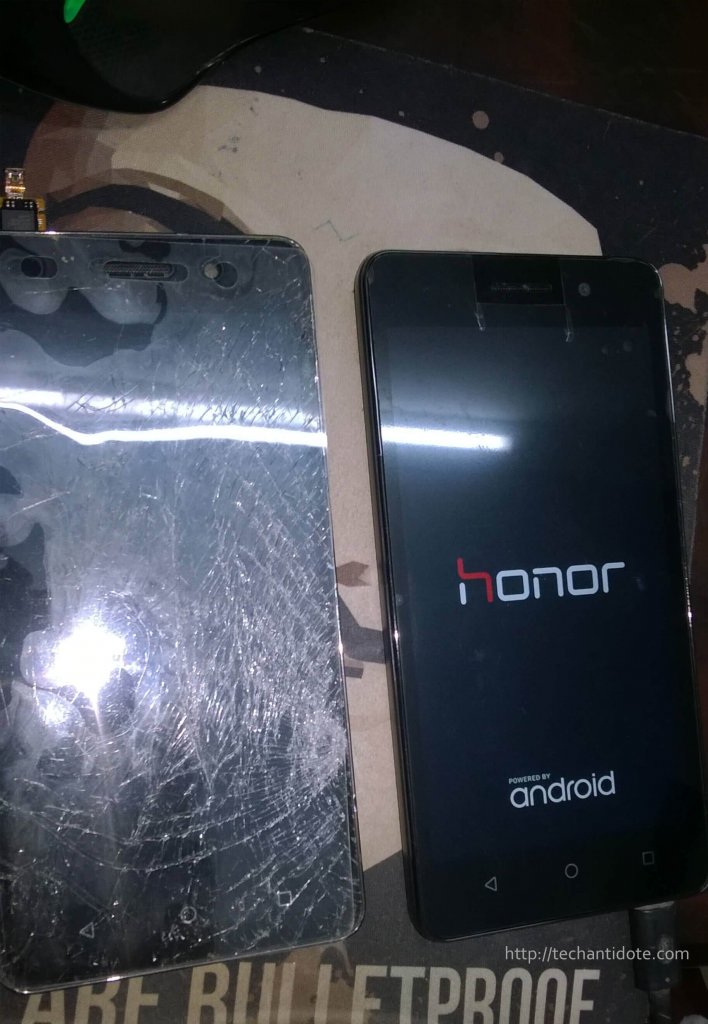
Here is the picture of the broken screen 🙁

My Honor 4C - broken LCD screen

This is the first time ever that I am taking apart a phone completely so pardon me for any mistakes. I had completed dissembling this phone a while back but just didnt get the time to post about it due to work.

So, I googled for weeks on tutorials on stuff like how to open up this phone, the tools you need and stuff like that.

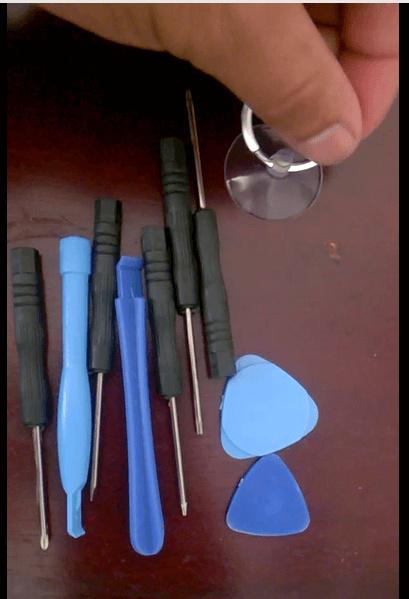
So, I bought a mobile repair kit which basically has a few screwdrivers, 2 x guitar strum looking things, 2 plastic crowbars and a suction cup. Here is a picture of the kit:

mobile repair kit

So, first thing I did was to remove the back shell.

Honor 4c back shell

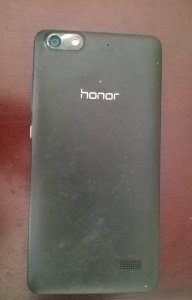
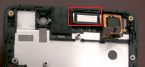
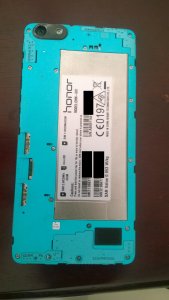
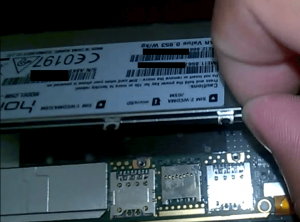
So, this is how the back portion looks after removing the back shell.

So, I started off by removing the screws near the battery and then the outer ones. Attaching a picture for their location for reference:

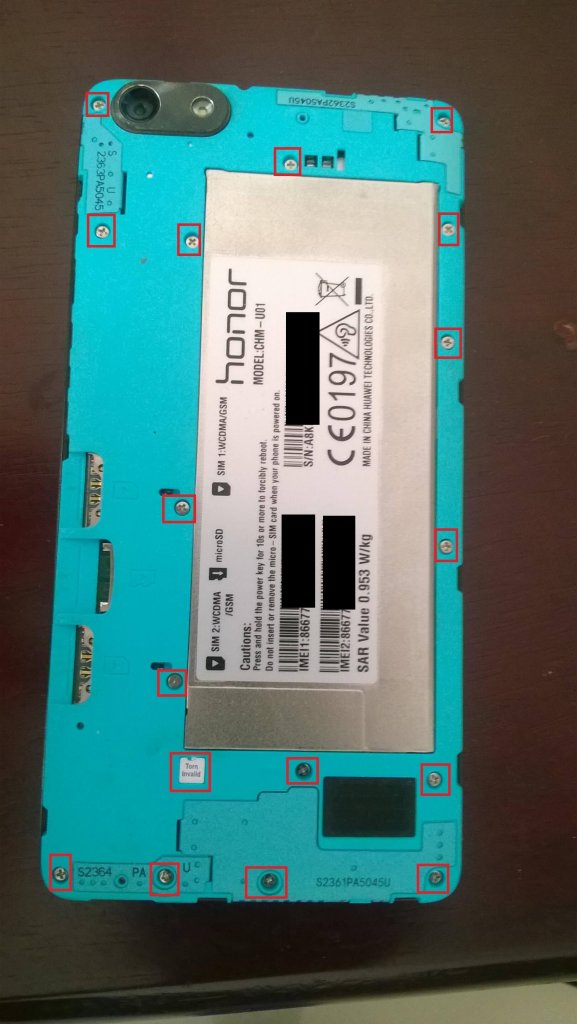
It took me a while to figure out that there under the “Torn invalid” sticker, there is a star screw hidden underneath it. Attaching a picture for reference below:

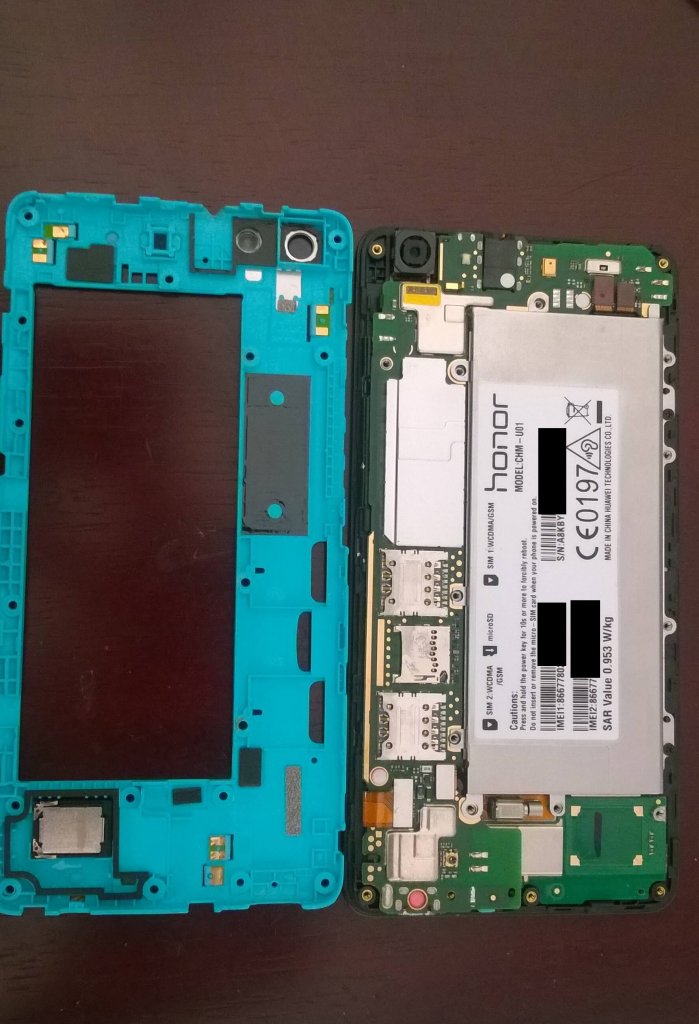
Now, we can gently take out the blue casing. This is what looks like once we remove the blue casing on the Honor 4c.

My baby is so pretttyyy on the inside!! 🙂 😛

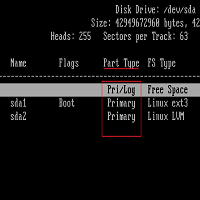
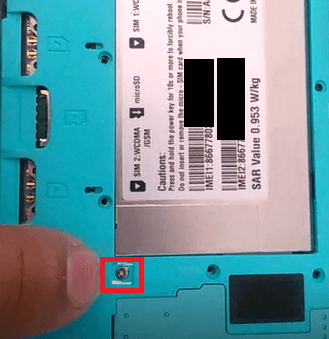
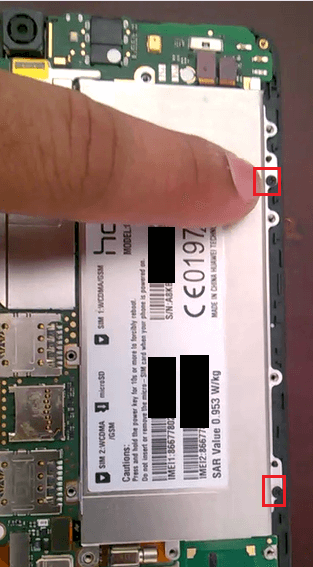
To remove the battery, I had to remove the two screws on the right side of the battery as shown in the red box below:

remove the two battery screws

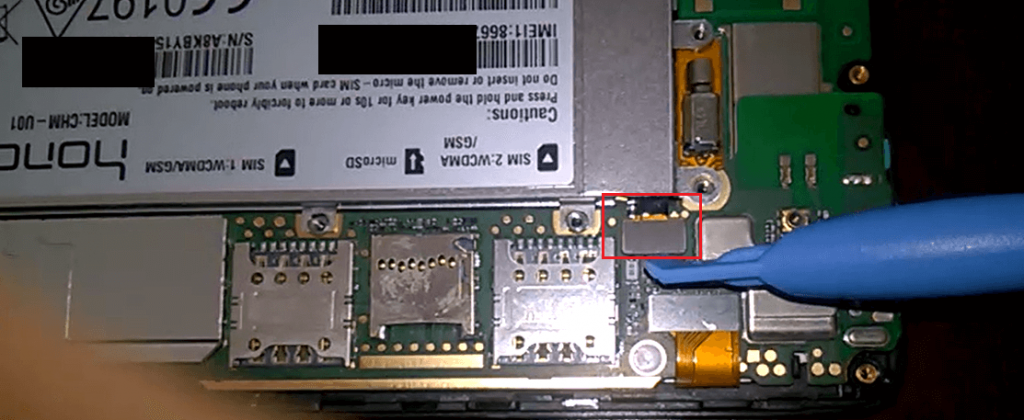
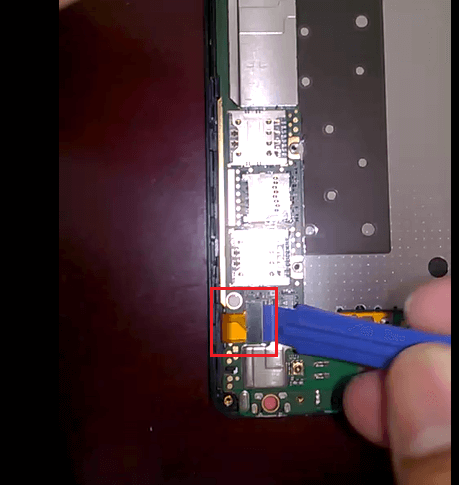
Now to pop the battery out, I had to lift and disconnect the battery connector as show below.

After disconnecting the battery cable, I was able to remove the battery by simply lifting the battery up.

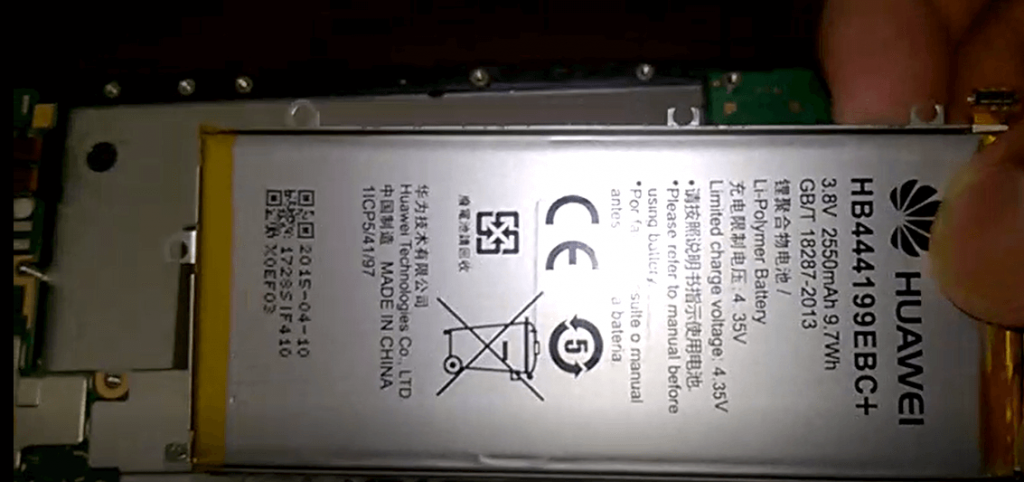
So, this is how the battery looks like:

back side of the battery

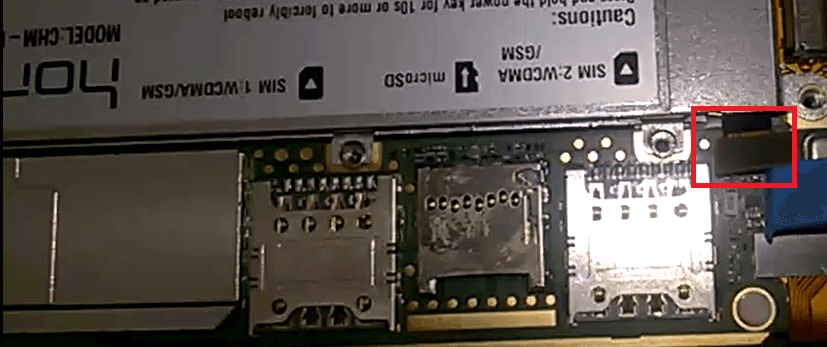
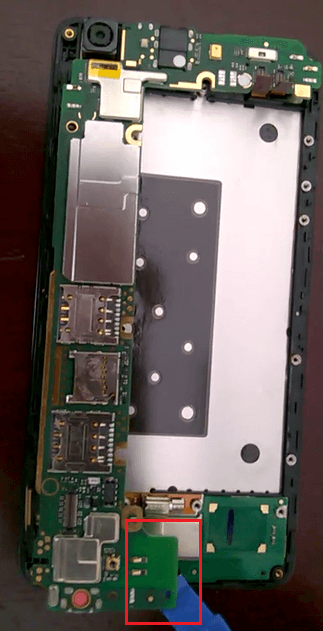
After the removing the battery, disconnect/pull  the below cable.

Honor 4c left side cable

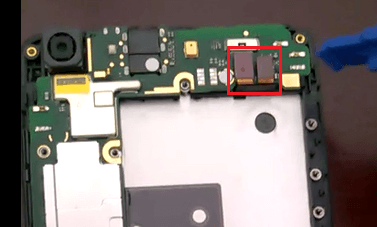
Then disconnect the below two cables.

honor 4c two cables


Now, we can separate the motherboard from the phone.

removing honor 4c motherboard removing honor 4c motherboard 2

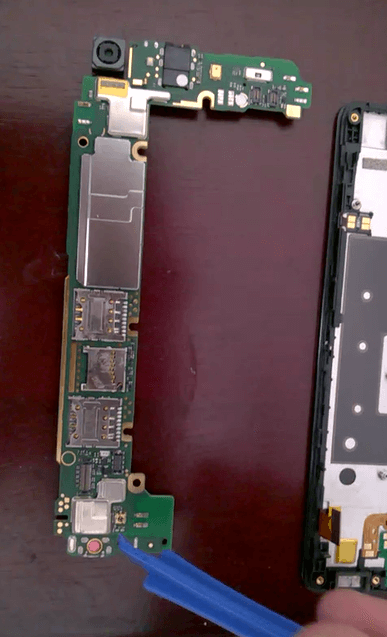
This is what my Honor 4c motherboard looks like.


Honor 4c motherboard

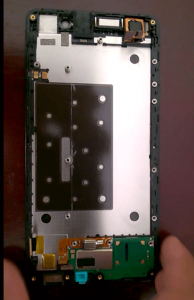
This is what the backside of the display looks like:(which has the Frame which holds the Display and the Touch Screen Digitizer).

Honor 4C LCD Display and Frame

So, I was able to disassemble my phone successfully! Wohoo!! 🙂 I know this is not a big deal for most people but its a big deal to me. I honestly didn’t think I could make it this far as I was alone in this learning journey. I am glad that I gained some knowledge on dissembling phones which is something I had never done before. I did make a video with audio instructions on the whole disassembly process but I am not sure I should upload it to my youtube channel or not. Lemme know what you think below in the comments section.

Do you think its worth repairing this and having it fixed? If you were in my shoes, would you hold on to your old phone?

Leave your comments in the comment section down below. I would love to hear what you have to say.

As always stay happy!  🙂

Happy blogging!

Regards,
ΞXΤЯ3МΞ

Nokia 3310 refresh will be re-launched this month at MWC 2017

Nokia is set to re-launch the iconic Nokia 3310 this month. It was one of the best phones back in 2000 & was built like a TANK! Remember the epic snake game? 🙂 The snake game that came pre-installed in this phone was so popular that you can even downloaded and play it today on your Android/Apple phones.

The phone is set to be launched at about $62 (USD) and will be revealed in MWC 2017 which is happening this month. If you are wondering, didn’t Nokia stop selling phones? Well, it was sold to another Finnish company “HMD Global” that bought rights to the “Nokia” brand.

Personally, I would love to get hands on one of these, wouldn’t you? Daymm, it would feel so retro! 🙂

Here are few hilarious memes about the indestructible Nokia 3310 that will get you laughing hard.

Thor's new hammer nokia 3310


footballer gets new protection - nokia 3310

Do leave a like and subscribe if you liked this article. Feel free to drop a comment on what you think about this phone. Cheers!

Source: Independent.co.uk

Image sources & Credits: quora.com , phonearena.com

Genuino Uno Rev 3 – A Quick Look

Just bought an Genuino Uno R3 and this is a quick look of the same.

Genuino Uno unboxing

Pinout Diagram:

FYI, below is the pinout digram of the Arduino/Genuino UNO R3 from Nick Gammon’s website.

Genuino/Arduino R3 Pinout Diagram
Source: http://www.gammon.com.au/uno

Just like the Arduino Uno, it comes with a Genuino Uno R3 board, ATMEGA microcontroller, some stickers and a “Thank you” booklet as shown above. All Arduino Uno units sold outside the US are named “Genuino UNO”.

I did install the Arduino IDE (Download Link ) in my Windows 10 machine and it was pretty straightforward. You can hook it to your PC/laptop and power it up using a “USB A to B” (printer cable). Alternatively, it can be powered via the DC jack using a 5v DC power supply (such as from an external battery pack).

I have hooked it up with a USB cable and once its connected, the status LED lights up as shown below.

I will be posting Arduino/Genuino tutorials in the near future. So don’t forget to subscribe and stay tuned for future updates.

Source (Pinout Diagram): Link

Make CentOS virtual machine in VirtualBox use the host’s VPN Connection

If your host PC (in my case Windows 10) is connected to a VPN but your CentOS 6.x VM is not using the VPN, then do the following:

1: Power off your CentOS VM.

2: Right click your centos machine in virtualbox and then click “Settings“.

right click your centos virtual machine and click settings (Screenshot)

3: Click “Network” and change the Adapter Settings to “NAT“.

change virtualbox network settings to NAT (Screenshot)

4: Now power on your centos virtual machine.

5: Once your VM boots up, login and then restart the network service. You can use the following CLI command “service network restart“.

Your CentOS virtual machine should now to able to use the VPN connection and use it accordingly. Do verify the same in your virtual machine. Hope this helps!

Do like and subscribe if this guide helped you. Cheers!