After installing CentOS 6.x or importing a preinstalled VDI image (for example from osboxes.org) if your network is not working or if eth0 does not show up, then you can follow these steps to fix it:
Step 1: Inspect ifconfig output
Run the following command:
ifconfig
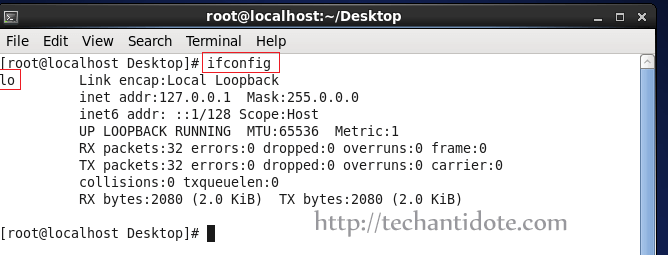
As you can see it shows only the output for loopback interface lo.
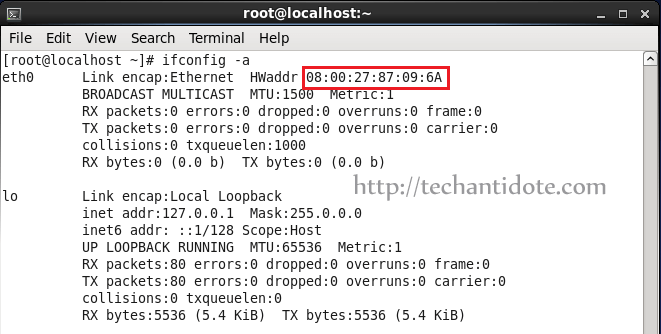
To find all interface information and MAC for eth0, run the following command:
ifconfig -a
Now, take a note of the MAC Address that you see in your screen as you will need it soon.
Step 2: Manually configure eth0 and network settings:
Type the following in your terminal:
vi /etc/sysconfig/network-scripts/ifcfg-eth0
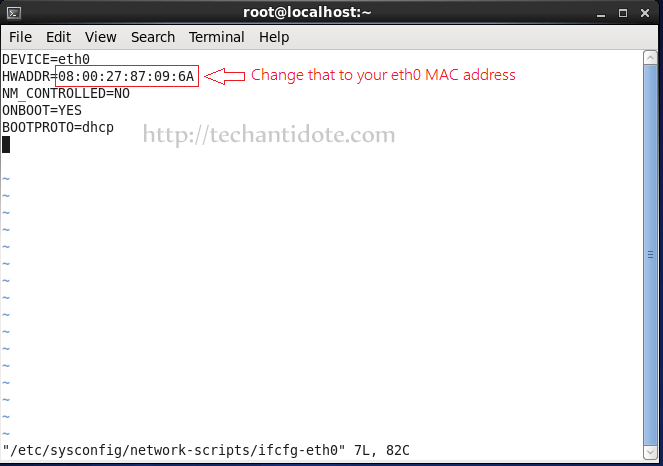
Change/edit the ifcfg-eth0 as the following, and make sure the HWADDR value is the MAC address that you took a note earlier.
DEVICE=eth0
HWADDR=08:00:27:87:09:6A
NM_CONTROLLED=NO
ONBOOT=YES
BOOTPROTO=dhcp
So, it will finally look something like picture attached below.
 To edit your network file, type the following command:
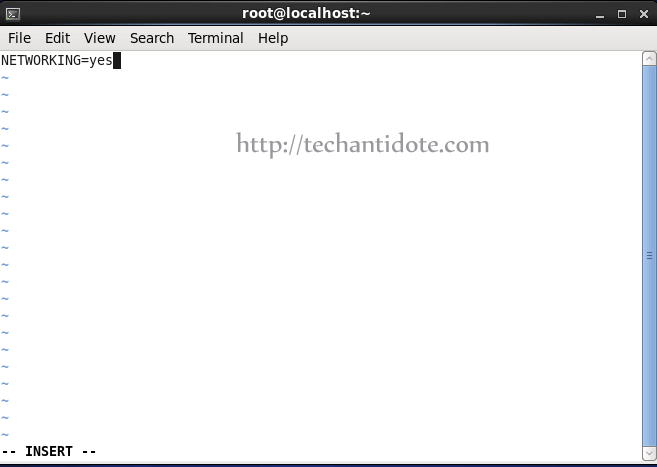
vi /etc/sysconfig/network
Now, add the following line if its not already present to the file:
NETWORKING=yes
Save the file and exit.
Step 3. Restart network service
service network restart
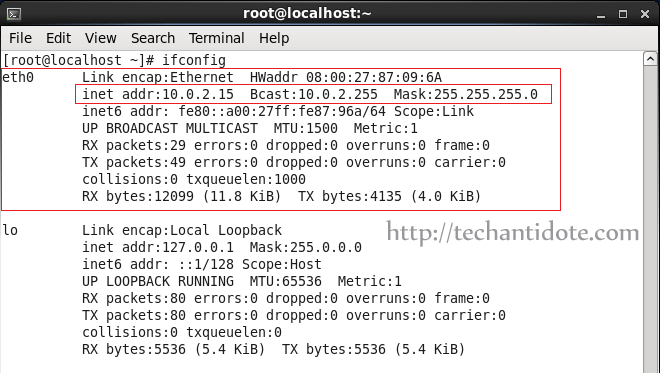
This should fix the issue and your eth0 interface should popup in no time as shown below.

You can also check the IP address information using ifconfig to check the assigned IP address.
ifconfig
Hope this helps! If you found this article helpful, do share this article by clicking on the sharing icons you see in your screen.
Feel free to leave a comment below if need any further help and will get back to you as soon as possible. Subscribe for future updates!
Source: Link