This is post on installing + setting up Signal Desktop application on an i3 / i3-gaps setup and enabling signal’s tray icon on your status bar.
Requirements:
1. Linux Mint/Ubuntu [This was tested on Linux Mint 20.2 ]
2. Window Manager – i3 or i3-gaps [ I am using i3-gaps ]
3. i3-bar / py3status
4. Signal Desktop Linux [ Ref: https://signal.org/download ]
Section 1: Install Signal Desktop
1. Install signal’s offical public software signing key.
wget -O- https://updates.signal.org/desktop/apt/keys.asc | gpg --dearmor > signal-desktop-keyring.gpg
cat signal-desktop-keyring.gpg | sudo tee -a /usr/share/keyrings/signal-desktop-keyring.gpg > /dev/null
2. Add repository to your list of repositories
echo 'deb [arch=amd64 signed-by=/usr/share/keyrings/signal-desktop-keyring.gpg] https://updates.signal.org/desktop/apt xenial main' |\
  sudo tee -a /etc/apt/sources.list.d/signal-xenial.list
3. Update your package database and install signal
sudo apt update && sudo apt install signal-desktop
[Note: The above instructions are from https://signal.org/download as of Sep 2021. Please refer to their website for the latest install instructions.]
Section 2: Setting up Signal for i3-gaps
If you invoke signal directly via rofi or manually from your terminal using signal-desktop, it works great but it does not enable tray icon by default which could be problamatic if you need to to minimize to the system tray (or to run in the background) if you quit out of the app. Arg!!
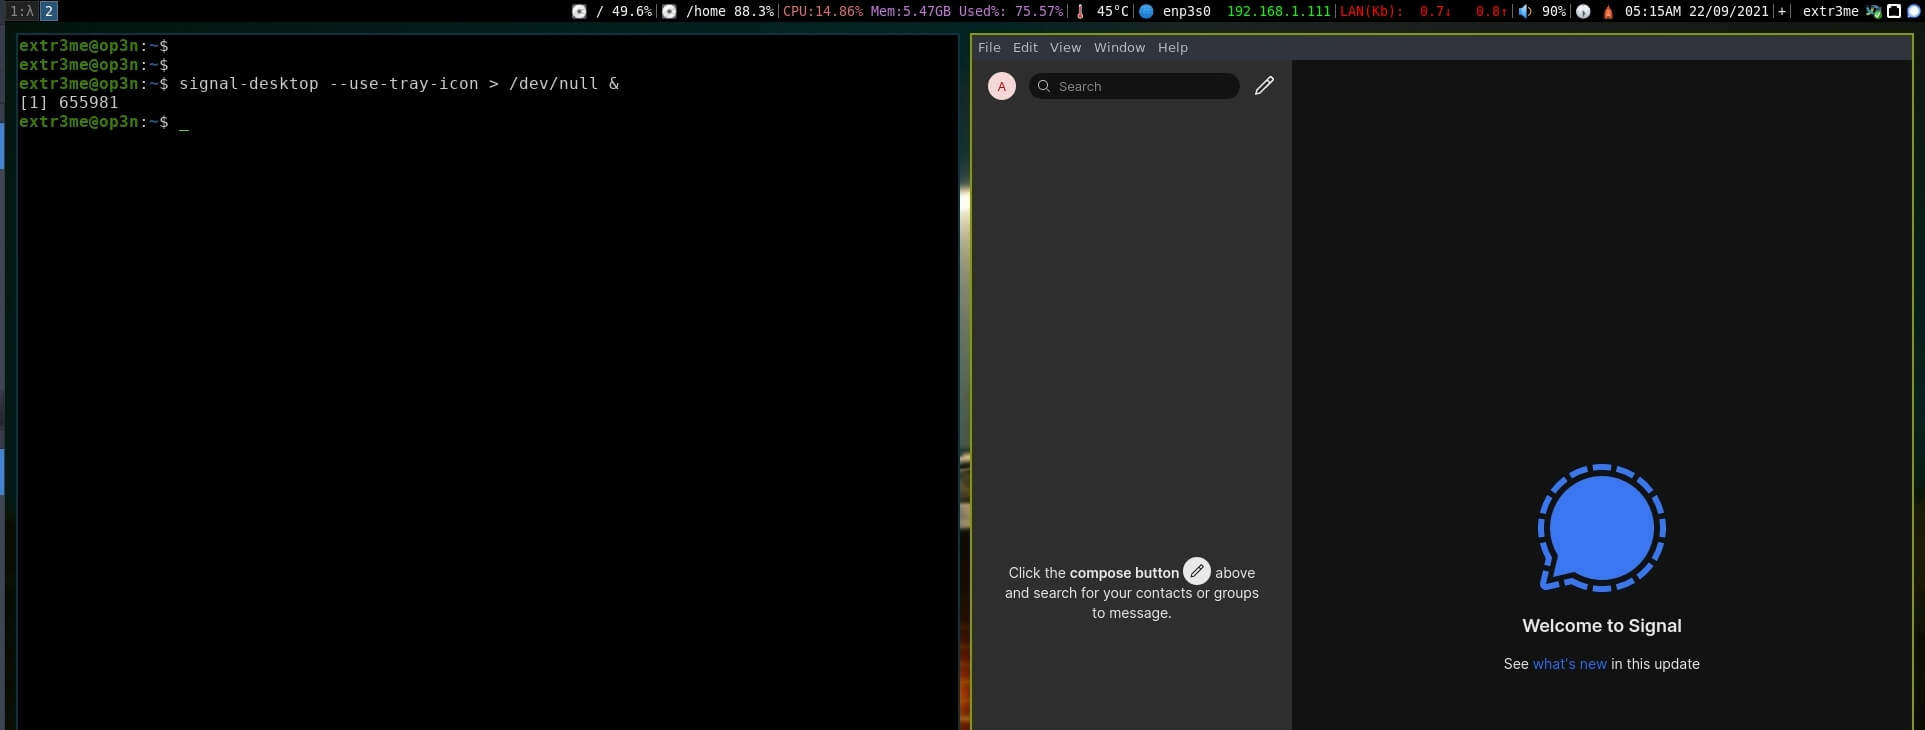
Luckily, signal-desktop ships with an additional flag that allows you to use the tray icon which will allow the Minimize function to work properly. To run signal with the tray icon, run the following:
signal-desktop --use-tray-icon > /dev/null &
Here is a screenshot from my setup with the signal tray seen in the bar. (You could right click image and open in new window for better viewing)
Adding keybindings i3 config:
I am sure there is a better way to do this. For now, I created a script start-signal.sh that calls signal-desktop with the additional argument.
vim ~/start-signal.sh
#!/bin/bash
signal-desktop --use-tray-icon > /dev/null &
Then make it executable:
chmod +x ~/start-signal.sh
I have configured my keybinding to Mod key + S (Windows key and s) to start signal-desktop and Mod + Shift + s (Windows key + Shift + s) which will kill signal. You can modify the text in bold below as per your liking. Here is a snippet of my i3 config file for reference:
vim ~/.config/i3/config
set $mod Mod4
set $terminal terminator
set $signal_with_tray ~/start-signal.sh
set $exec exec –no-startup-id
# Start Signal using Mod key + s
bindsym $mod+s $exec $signal_with_tray
# Kill Signal using Mod key + Shift + s
bindsym $mod+Shift+s $exec $terminal -e ‘pkill signal-desktop’
Regards,
ΞXΤЯ3МΞ