Useful Linux Terminal shortcuts

Here are some useful Linux Terminal Shortcuts:

Shortcut 1: Run previous typed command

In your Linux terminal, type:

# ls -l

Now, if you want to run this command again i.e the (previous command), type the following and hit ENTER:

# !!

This will run the command which was previously typed i.e ‘ls -l’.

Shortcut 2: Run command with last argument from previous command

For this example, lets create an empty file one.txt:

# touch one.txt

Now, lets use the following command:

# cp one.txt one.bak

Lets break down this command according to its arguments:

1st argument – one.txt

2nd argument / last argument – one.bak

[ Note: We can logically say that the 0th argument is the command cp itself. ]

Lets say we want to edit the file “one.bak” (which is the last argument for command cp, we can use:

# vi !$

The above command is same as running ‘vi one.back‘. Also note that the !$ passes the last argument of the previous command to the current command vi.

Shortcut 2 (Alternative):

Now, lets use the following command:

# cp one.txt one.bak

An alternative way to provide an argument from the previous command to another command is by using !:<argument number>. For example, to pass the 2nd argument of the last command, we use !:2 as follows:

# vi !:2

Here !:2 means that we are passing the 2nd argument of the previous command.

Shortcut 3 : Linux Terminal Keyboard shortcuts

To get the previous command: Press the UP arrow in the keyboard.

To kill a process when you are in the Linux terminal: Press <CTRL> + C in your keyboard.

Shortcut 4 : Autocomplete:

Trust me when I say this, this shortcut makes your life easier. If you need to auto complete a command, you can use the TAB key in your keyboard. This is one the shortcuts that is used by most Linux users.

Example:

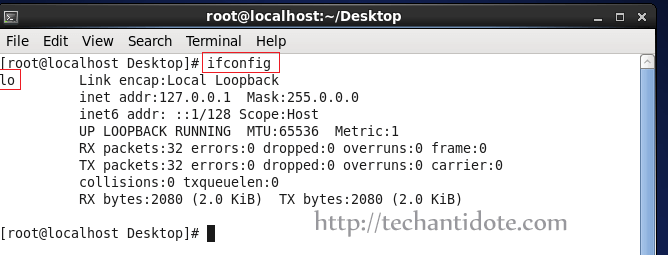
If you want to type ifconfig in your Linux terminal, you can start typing the command and then press the TAB key to auto complete it. In this case, type ifcf and then press TAB and it will autocomplete the command.

The TAB feature can also be used to autocomplete known information such as file names which are passed as arguments.

For example: Lets assume in the current directory that you are on has only two files first.txt and second.txt. Now, if you need to type this command ‘cat first.txt second.txt‘, then you can use the TAB shortcut to auto-complete it by following these steps:

Type cat and then type f and then press TAB to autocomplete it to:

 cat first.txt

Then type the first letter of the next argument i.e. type s and then press TAB, which it autocomplete the command to:

cat first.txt second.txt

Shortcut 5: Move between words

  • Navigate to the next word from current position:

Press <CTRL> and <Right Arrow key> in your keyword to move to the next word(towards the right side of current cursor position) in your terminal. This is also applicable in Linux editors such as vi or vim.

  • Move to previous word in terminal from current position:

Press <CTRL> and <Left Arrow key> in your keyword to move to the previous word/the word to the left side from current cursor position in your Linux terminal (or most editors). You can press it again accordingly, if you need to move the cursor one word at a time towards the left direction.

The above two shortcuts are useful when you are entering commands in the Linux terminal and need to correct a particular word in the command. This helps navigating back and forth between words/parameters in the command with ease.

Other Bash Shortcuts:

To go to the 1st terminal, press CTRL, ALT and the function key F1 in your keyboard.

To go the nth terminal, press CTRL, ALT and Fn (where Fn can be function keys F1, F2, F3 etc).

To paste previously copied text to your Linux terminal/editor, you can press the middle button in your mouse. Now, How cool is that uh? 🙂

To lock your Linux machine press <CTRL> <ALT> and the letter l in your keyboard.

And that’s it for now, hope its been informative. I will be updating this article in the future with more Linux terminal shortcuts  as soon as I find new ones, so stay tuned! If this article helped you, do leave a comment below and like us on Twitter and Facebook. Cheers!

Hope this helps!

How to install CentOS 6.7 minimal on virtualbox + Screenshots

This is a guide on how to install CentOS 6.7 minimal on virtualbox (text mode) in Windows 8.1 including screenshots. Hope this helps!

Requirements:

  1. CentOS 6.7 32-bit ISO : Download Link (~354 MB) {Note: Download the minimal version.}
  2. VirtualBox : Download Link (~114 MB)
  3. Atleast 8GB of free space
  4. CPU that supports Virtualization

Installation Procedure:

First, thing we need to  do is to set up Virtual Box. Go ahead download and install Virtual Box (the download link is given above in the requirements).

Open VirtualBox and click on “New“.

Click on "New" to create VM

Type in “Name” as anything you like. I have named mine as “CentOS 6.7 minimal (32-bit)“. Make sure that the “Type” is “Linux” and the “Version” is “Redhat (32-bit)” as we have downloaded the 32-bit version of CentOS. Then click on “Next“.

select type as "Linux" and Version as "Red Hat (32-bit)"

Now, select the amount of memory /RAM you need to allocate to your CentOS virtual machine. For this installation, allocate 512 MB of RAM for text mode installation and then click on “Next“.

select 512mb RAM

You can now click on “Create a virtual hard disk now” and then click “Create“.

Click "Create a virtual hard disk now"

Now, select the first option “VDI (VirtualBox Disk Image)” and then click on “Next“.

Select VDI

Select “Dynamically Allocated” and then click on “Next“.

Select "Dynamically allocated"

You can now select the size of the hard disk you need to allocate for your CentOS virtual machine and then click on “Create“. I would suggest a minimum of “8 GB”.

[Optional: If you need to change where the hard disk file is to be saved, you can click on the folder icon in the green box and change it accordingly.]

Provide atlease 8gb hard disk space

Now, click on the CentOS virtual machine that you created and then click on “Start” as shown below.

Select CentOS VM and click Start

We need to provide the CentOS ISO file we downloaded earlier to Virtualbox for the VM to boot from the ISO image. You can do this by clicking on the folder icon as shown below and then selecting the CentOS ISO file and then clicking on “Open“.

Click on folder icon

Select ISO file and click Open

Once, you have selected the ISO file, you can click on “Start“.

click start

The virtual machine will now boot from the provided CentOS ISO image and you will be presented with the boot menu as shown below. Select the first option “Install or upgrade and existing system” and hit Enter in your keyboard.

Select "Install or upgrade and existing system"


booting progress

[Note: In this mode (i.e the text mode), you can use the arrow keys in your keyboard or the TAB key in your keyboard to move through different options and Enter to confirm selection.]

Now, use your arrow key/ TAB key to select option “Skip” and hit ENTER in your keyboard.

select "Skip" and hit Enter

Installation starting

You will see a message “Welcome to CentOS!” with an “OK” button. Hit Enter in your keyboard.

hit Enter

Select the language as “English” and hit Enter.

Select "English" and hit Enter

Select the keyboard layout as “us” and hit Enter.

select us keyboard

Now, you will get a Warning message “Error processing drive“. Select the last option “Re-initialize all” using arrow/ TAB keys and hit Enter.

Select "Re-initialize all" and hit Enter

Now, make sure you select the right time zone. You can use the arrow keys to cycle down each entry or you can use the Page UP/ Page Down key in your keyboard to cycle through the list quickly. After you have selected the Time Zone, select “OK” and hit Enter in your keyboard.

Select "Time Zone"

Now you need to create a root password for your CentOS virtual machine. Finally select “OK” and hit Enter.

Enter password for root account

Select the first option “Use entire drive“, then select “OK” and hit Enter in your keyboard.

Select "Use entire drive"

Hit Enter

Select “Write changes to disk” and hit Enter.

Select "Write changes to disk"

This will now install all the required packages. It would take a few minutes depending on the speed of your computer.

Installation progress

Once installation is complete you will be prompted with a “Reboot” button. Hit Enter for the CentOS virtual machine to restart.

Select "Reboot"

centos virtual machine rebooting

You should see the CentOS booting progress as shown below.centos boot screen

You will now be prompted with the login screen.

centos login prompt

Now, type the username as “root” and hit ENTER in your keyboard. Then type in the root password that you created during installation and hit Enter. Upon successful login, you will see the bash prompt with # symbol at the end.

succesfully logged in as root

And Voila! You have successfully installed CentOS 6.7 minimal in VirtualBox using text based installation method. I will be creating another post on how to configure the network manually in CentOS 6.7 using the terminal.

If you have any queries regarding this installation, feel free to leave a comment below and will get back to you. Do subscribe to my blog get future updates! 🙂

ifconfig does not show eth0 in centos 6 on virtualbox – Solution + Screenshots

After installing CentOS 6.x or importing a preinstalled VDI image (for example from osboxes.org) if your network is not working or if eth0 does not show up, then you can follow these steps to fix it:

Step 1Inspect ifconfig output

Run the following command:

ifconfig

ifconfig no eth0

As you can see it shows only the output for loopback interface lo.

To find all interface information and MAC for eth0, run the following command:

ifconfig -a

Now, take a note of the MAC Address that you see in your screen as you will need it soon.

eth0 mac address

Step 2: Manually configure eth0 and network settings:

Type the following in your terminal:

vi /etc/sysconfig/network-scripts/ifcfg-eth0

Change/edit the ifcfg-eth0 as the following, and make sure the HWADDR value is the MAC address that you took a note earlier.

DEVICE=eth0
HWADDR=08:00:27:87:09:6A
NM_CONTROLLED=NO
ONBOOT=YES
BOOTPROTO=dhcp

So, it will finally look something like picture attached below.

ifcfg-eth0 configuration file
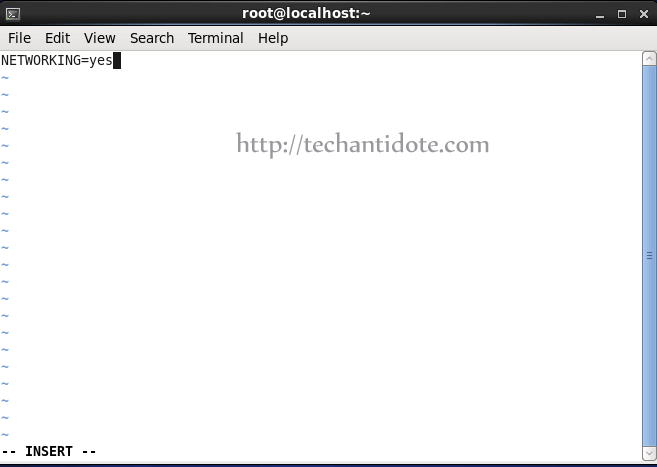
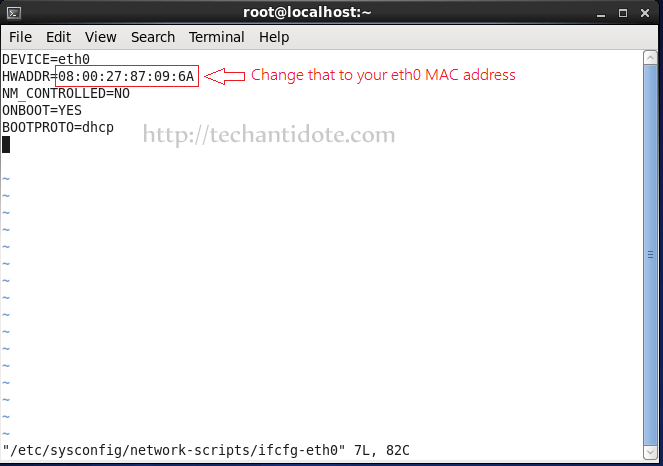
To edit your network file, type the following command:

vi /etc/sysconfig/network

Now, add the following line if its not already present to the file:

NETWORKING=yes

/etc/sysconfig/network file

Save the file and exit.

Step 3. Restart network service

service network restart

This should fix the issue and your eth0 interface should popup in no time as shown below.

service network restart no output fixed

You can also check the IP address information using ifconfig to check the assigned IP address.

ifconfig

eth0 ifconfig output solved

Hope this helps! If you found this article helpful, do share this article by clicking on the sharing icons you see in your screen.

Feel free to leave a comment below if need any further help and will get back to you as soon as possible. Subscribe for future updates!

Source: Link

How to install apache from source in Centos 6.7

This is a simple guide on how to configure Apache from source in Centos 6.7 + installing APR, APR-UTIL and PCRE to make it work.

Step 1. Install gcc:

Open up your terminal window and type the following command:

yum install gcc gcc-c++

Now, change to following directory:

cd /usr/src/

Step 2: Download and configure APR :

To download the APR file, use the below command:

wget http://a.mbbsindia.com//apr/apr-1.5.2.tar.gz

Now extract the downloaded file:

tar -zxvf apr-1.5.2.tar.gz

Change to the extracted folder and run the following commands to configure apr:

cd apr-1.5.2
./configure –prefix=/usr/src/apr
make
make install

Step 3. Download and configure apr-utils:

Change to following /usr/src/ directory:

cd /usr/src/

To download the APR-UTIL file, use the below command:

wget http://mirror.fibergrid.in/apache//apr/apr-util-1.5.4.tar.gz

To extract file, change to extracted folder and to configure apr, run the following commands:

tar -zxvf apr-util-1.5.4.tar.gz

cd apr-util-1.5.4
./configure –prefix=/usr/src/apr-util –with-apr=/usr/src/apr/
make
make install

Step 4. Download and config PCRE:

Change to /usr/src/ directory:

cd /usr/src/

To download pcre2-10.21.tar.gz type the following your terminal:

wget ftp://ftp.csx.cam.ac.uk/pub/software/programming/pcre/pcre2-10.21.tar.gz

To extract file, change to extracted folder and to configure pcre2-10.21, run the following commands:

tar -zxvf pcre2-10.21.tar.gz

cd pcre2-10.21
./configure –prefix=/usr/src/pcre2
make
make install

Step 5. Download Apache / httpd:

Now, change to following directory:

cd /usr/src/

To download httpd tar ball type the following your terminal:

wget http://a.mbbsindia.com//httpd/httpd-2.4.18.tar.gz

To extract file, change to extracted folder and to configure httpd, run the following commands:

tar -zxvf httpd-2.4.18.tar.gz

cd httpd-2.4.18
./configure –prefix=/usr/local/apache2 –with-apr=/usr/src/apr –with-apr-util=/usr/src/apr-util –with-pcre=/usr/src/pcre2/bin/pcre2-config
make
make install

Step 6. Start and test your apache server 

service httpd start
httpd -v

You can also open your browser and go to:

http://localhost/

And it should give you the Apache Welcome page.

And Voila! You have successfully configured apache from source. Hope this helps!

[DISCLAIMER: This guide is strictly for the purpose of learning how to configure apache from source for beginners. This should not to be used in a real production server as no security measures has been discussed or implemented in this tutorial.]

If you liked this article, do leave a comment below. You can also share this article by clicking on the social media buttons below. 

Source: ApacheTroubleshooting source: APR troubleshooting

How To fix “This kernel requires an x86-64 CPU, but only detected an i686 CPU. This processor is unsupported in RHEL 7.” when booting from VirtualBox

Error: This kernel requires an x86-64 CPU, but only detected an i686 CPU.
This processor is unsupported in RHEL 7. 

centos-boot-error

[Note: This tutorial is under the assumption that your physical CPU is 64-bit and your installed host OS is 64-bit and will only work in these circumstances.]

Cause:

This mainly happens due two reasons:

  1. If you have a 64-bit OS installed but the VirtualBox OS type is accidentally changed/set to 32-bit after installation.
  2. If Vt-X (Virtualization) is disabled in the BIOS. (This can happen if you reset your BIOS to default settings which may have disabled Vt-X  bit).

Solution:

Step 1: Right Click on the Centos/RHEL OS which is giving you the error and then click on “Settings“.

virtualbox settings

Step 2: In General Tab, check the OS Type and see if you are able to change to “Redhat 64-bit” and follow step 4.

change os type

Step 3: If you are only able to see 32-bit entries in the OS type list and your physical CPU supports 64-bit, this means that Vt-X is disabled in your BIOS. So, restart your PC and boot into your BIOS, enable Vt-X.

For reference, I have a Asus Maximus VII Ranger Motherboard and here is how I enabled Vt-X in my BIOS.

enable vt-x

[Optional: If your CPU supports Vt-d, enable that too, it will improve functionality and performance of your Virtual Machine. Some CPUs will not have the Vt-d function, if you dont have it then you can ignore it]

optional step to enabled vt-d

Step 4: Restart your computer and boot back your CentOS/RHEL VM and it should come right up.

centos boot error fixed

Hope this fixed the issue. If this tutorial helped you,do  leave a thumbs up a comment below. Hope this helps! 🙂

If you have any sort of queries,  just leave a comment below and will get back to you. Don’t forget to follow my blog to get future updates! 😀

Regards,
ΞXΤЯ3МΞ