How to improve WordPress load times

Step 1. Perform a speed test

Go to https://tools.pingdom.com and enter your website to test your current load time. This is to get a idea the load time and performance score for reference.

Step 2. Configure Cloudflare CDN for your wordpress

You can configure cloudflare CDN for your wordpress website for free which will reduce latency and hence improve page load speeds. Create an account at http://www.cloudflare.com and change your name servers to the ones provided by cloudflare. For a more detailed guide with screenshots on how to configure cloudflare CDN for your website, you can find it here. (Link opens in new tab)

Step 3. Optimize your images

If your wordpress blog has a ton of images, then its best you optimize them so that your blog would load faster. You can either use plugins such as ‘WP Smush‘ (Plugin Link) or “Compress JPEG & PNG images” (Plugin Link) to optimize images. You can also manually optimize it and upload them if your an expert.

I also did notice that if the image are of .PNG format, then its best to use Tiny PNG (https://tinypng.comor use their plugin “Compress JPEG & PNG images” as it is more efficient than ‘WP Smush’.

Step 4. Remove Google Fonts

If your theme loads google fonts, you may find few requests going out to the google server which can slow down your site. Disabling it is easy and all you have to do is install plugin named ‘Remove Google Fonts References.

Step 5: Disable Gravatar Hoovercards

This step is only needed if you have installed and configured Jetpack for your wordpress blog.

Go to your wordpress dashboard, click on Settings>Discussion.  Uncheck the option “View people’s profiles when you mouse over their Gravatars” next to “Gravatar Hovercards”.

If ‘Gravator Hovercards’ section is greyed out, then click on “Shows Avatars”, uncheck “View people’s profiles when you mouse over their Gravatarsand then uncheck “Shows Gravatar” and save changes.

Step 6. Remove query strings from static resources

This have a huge impact on your performance score in pingdom and Gtmetrics. I have written an article on how to remove query strings from static resources to improve load times here. (Link opens in new tab)

Step 7. Remove unwanted plugins

Like the title suggests, if you don’t use a plugin its best to remove them.

Once done, re-run the speed tests https://tools.pingdom.com to compare before and after performance results.

Sources: Link

How to fix “mysqld dead but subsys locked” EC2

My webserver’s mysqld service went down with the error message “mysqld dead but subsys locked”. The wordpress website was displaying the error “error establishing a database connection”. This is how I fixed it.

Upon visiting my website, I got the error message as shown below.

error establishing database connection ec2

Verify Issue – Check mysqld status:

To check the status of the mysqld database service, connect to your Amazon EC2 instance and then type the following command.

sudo service mysqld status
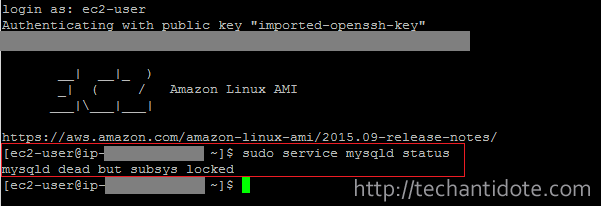
mysqld dead but subsys locked ec2

Investigate log files:

I checked my mysqld log files and found that the mysqld service was malfunctioning due to low memory.

sudo cat /var/log/messages | grep mysqld | less

check mysqld events in /var/log/messages
To check further events of mysqld , you can check mysqld.log using the following command:

sudo cat /var/log/mysqld.log | less

In my case, I found the mysqld service was panicking and got shutdown due to memory problems. [Note: The above outputs would differ from mine.]

Check if swap is present or not:

Run the below command to check if you have swap on your EC2 instance.

free -m

check if swap is present in ec2 using 'free -m' command

You can see here that Swap is 0. [Note: Swap is by default not created in your Amazon EC2 micro instance (free tier).]

Solution:

To resolve this issue, we need to create a swap file, mount it and make it persistent on boot.

Create swap file (1GB):

Type the following commands to create and activate the swap.

sudo dd if=/dev/zero of=/swapfile bs=1M count=1024

create swap file ec2

sudo mkswap /swapfile

mkswap command

Secure the swapfile:

To secure the swapfile from unauthorized access, type the following commands:

sudo chown root:root /swapfile

sudo chmod 600 /swapfile

chmod command to set swap file permission ec2


Finally, type the following command to load the swapfile and hit Enter.

sudo swapon /swapfile

Make swap persistent on boot:

To make the swap persistent on boot, edit the file /etc/fstab using the following command:

sudo vi /etc/fstab

Add the following at the end of the fstab file:

/swapfile swap swap defaults 0 0

Save and exit the file. Press ESC  and then type :wq and hit Enter.

Check if swap is active:

You can run the command below to check if swap is active or not.

free -m

check if swap is active free -m

As you can see highlighted section, the swap of size 1023MB is activated. It would use the swap file whenever necessary.

Restart / Start mysqld service:

You can type the following command to start the mysql service.

sudo service mysqld start

service mysqld start

Voila! You should now be able to access your website.

Change swappiness (Optional):

This step is purely optional. I would like my EC2 to use the RAM majority of the time and use the swap file when necessary. As you may know, its faster to access data from in the RAM rather than switching to the swap file which is stored in a mechanical drive in cloud.

sudo sysctl vm.swappiness=10

change swappiness

And that’s it folks, this should resolve the problem with the mysqld service crashing in your EC2 instance.

If this article helped you, do leave a comment below and follow us on Twitter, Facebook and Tumbler. You can also subscribe to our email subscription list to get latest updates right to your email. Cheers!

References: isitablog

WordPress 4.5 released! Here’s whats new

WordPress 4.5 has been released and some of the new features.

Logo Support in Theme Customizer:

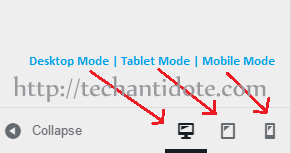
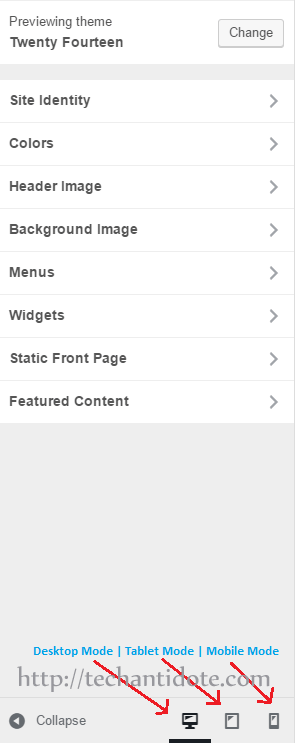
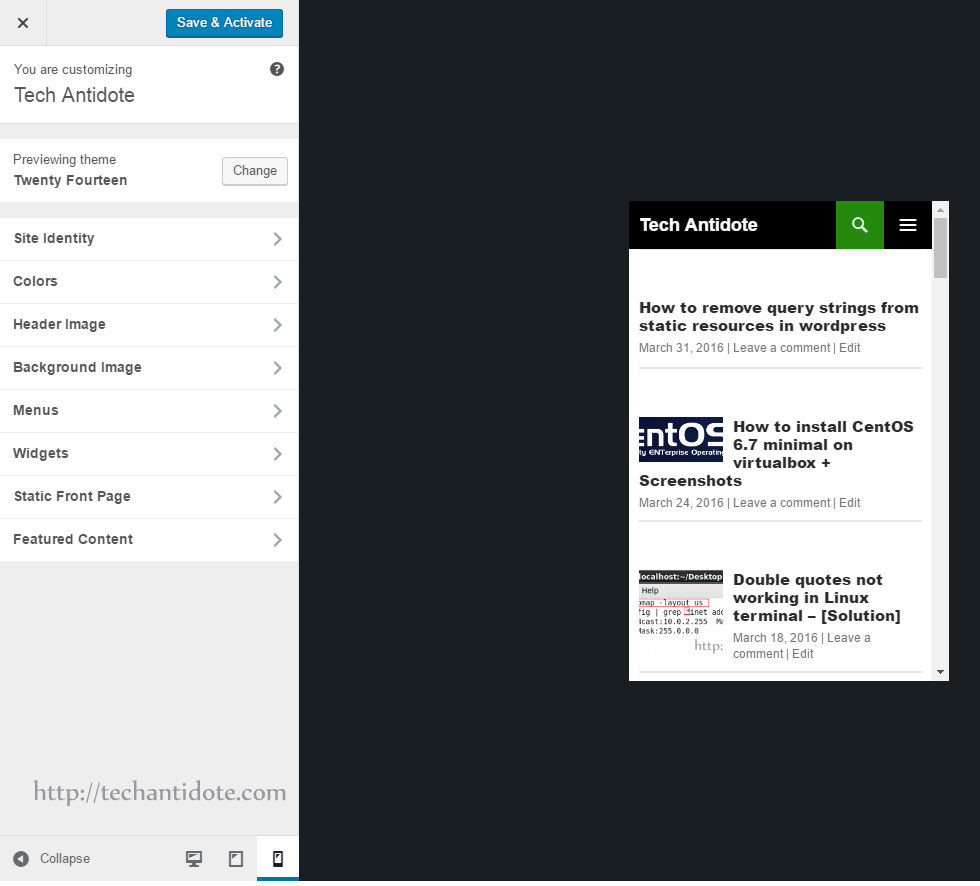
With wordpress 4.5, you can now see how the theme will look in a PC, tablet and mobile within the theme customizer itself. I have added a screenshot of how to check the different modes below.

wordpress 4.5 desktop, tablet and mobile mode selection

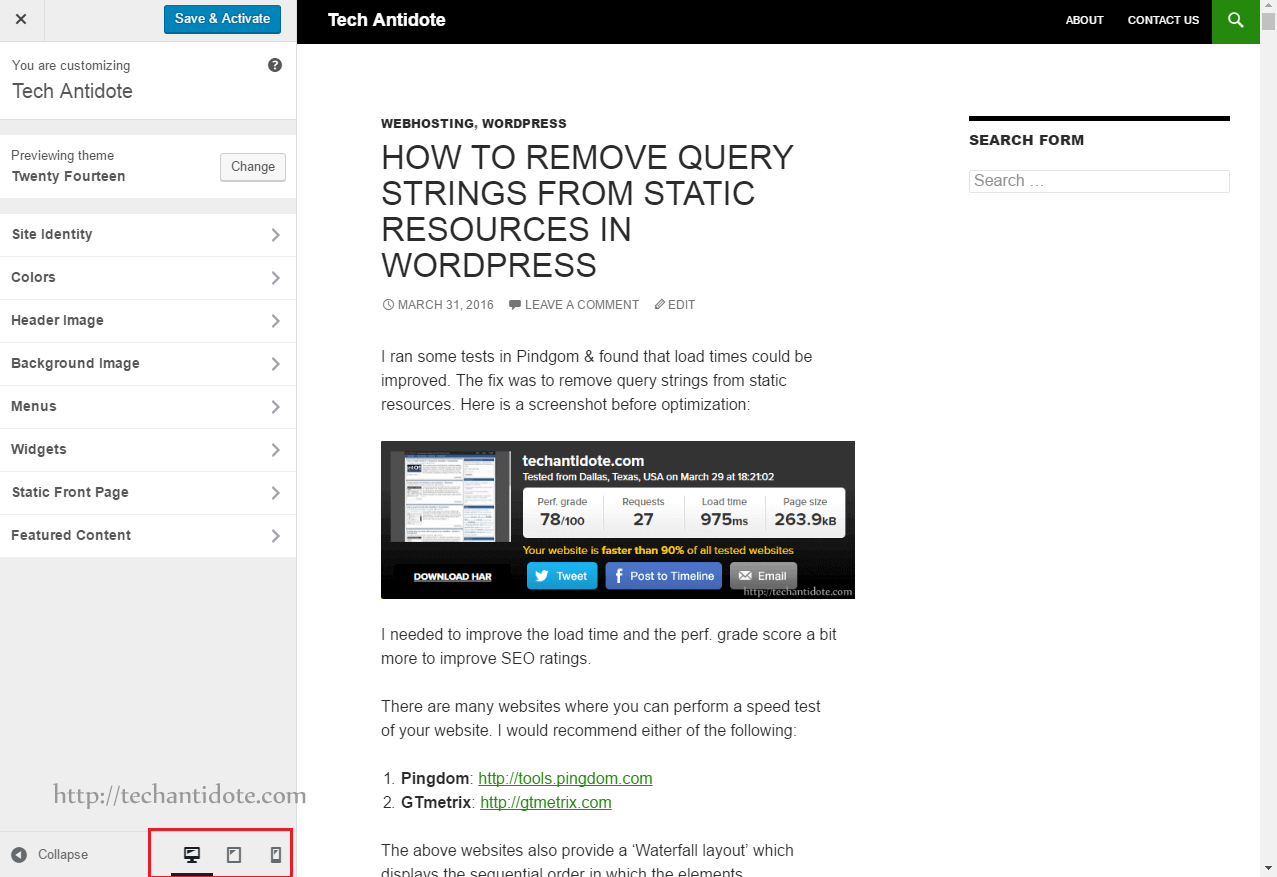
I have added some screenshots of theme customizer in different modes below.

WordPress customizer in Desktop Mode:

wordpress 4.5 customizer displaying theme in desktop mode

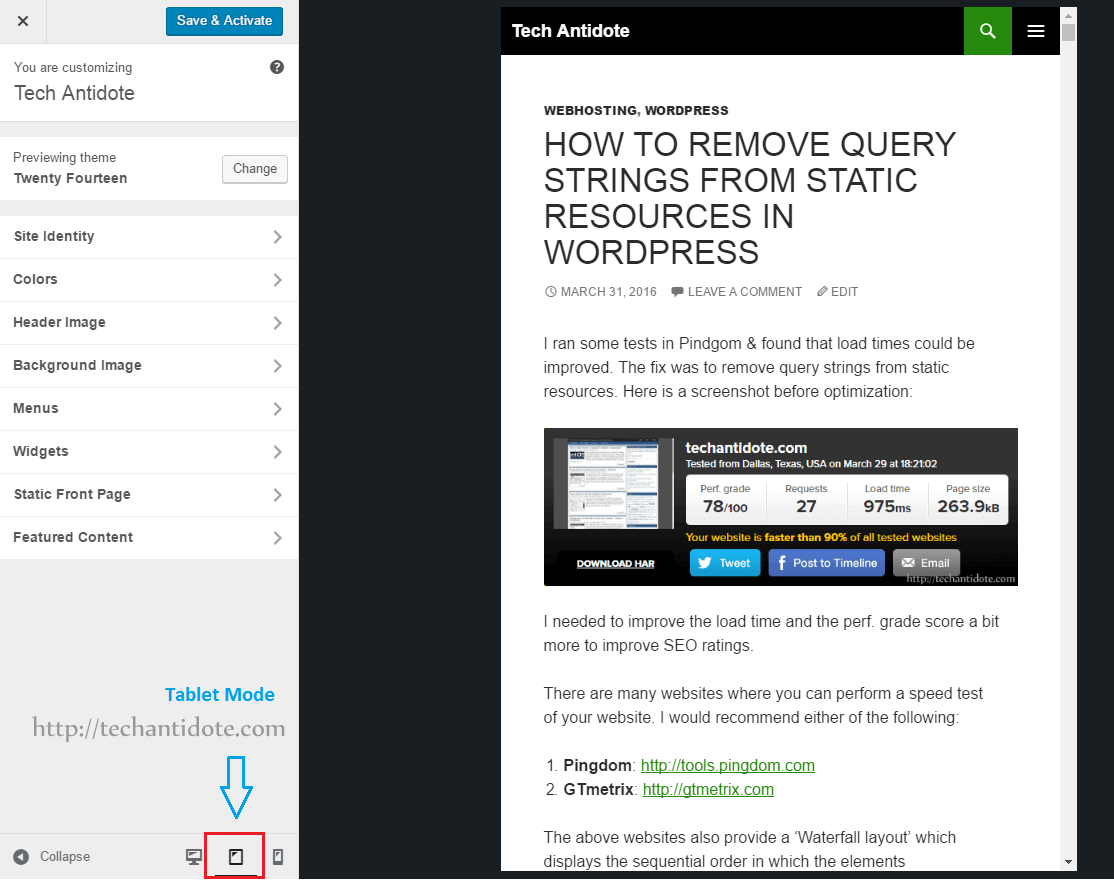
WordPress customizer in Tablet Mode:

wordpress 4.5 customizer displaying theme in tablet mode

WordPress customizer in Mobile Mode:

wordpress 4.5 customizer displaying theme in mobile mode

Theme Logo upload feature:

You can upload a theme logo and add it using customizer itself. You can find in under the “Site Identity” section. [Note: Not all themes will have this capability. If your theme supports it, you will be able to use this feature. The theme ‘twenty sixteen’ wordpress theme supports adding theme logo, do check it out.]

wordpress 4.5 site logo upload option

New Visual Editor features:

Now, you can easily link to your previous articles by using the searching while you are in the visual editor page. To use this feature, click on the ‘Insert/Edit link‘ button then start typing to search for your previously published articles. Finally click on the desired article and it would be linked. Now that a sweet feature. I love it! What do think?

add link

Other Inline Text Shortcuts:

There are a few new shortcuts added with the new wordpress update. You can either choose to use them or disable shortcuts completely. According to the wordpress website, some of the shortcuts include:

— transforms to <hr />

Use `your code` to transform <code>my code</code>

Optimized Images:

WordPress 4.5 can now optimize images and reduce image size by almost 50% without reducing quality.  Personally, I use http://tinypng.com to optimize my images before uploading to wordpress to get the best possible results while preserving the original quality.

Comment Refinement:

In the new comment moderation for wordpress include several bug fixes and new features. Comment content will now be formatted for display instead of a block of escaped text. Other improvements for comment moderation include updated message styles.

There are also limits specified for the comment fields such as a comment can have a max 65525 characters. Similarly, name can be max up to 254 characters, email of 100 characters and URL of 200 characters.

Security during Installation:

Now wordpress 4.5 installations will generate keys and salts locally rather than using the wordpress.org API.

New Developer Features:

Selective Refresh:

This feature allows only specific portions to be refreshed rather than the whole page in the customizer. This makes live previews a whole lot faster.

Script Loader:

With wordpress 4.5, you can now add inline scripts using the wp_add_inline_script() function. Also according to wordress changelog, support for scripts with depenedincies in different groups have been added.

To see the entire list of change, bug fixes, features and other improvements you can visit wordpress blog post mentioned in the source down below.

If you liked this article, please share this article. Do like us on Facebook and follow us on Twitter to show your support. Feel free to leave a comment down below. Happy Blogging! Cheers!

Source: WordPressJoe McGill (WordPress)

How to remove query strings from static resources in wordpress

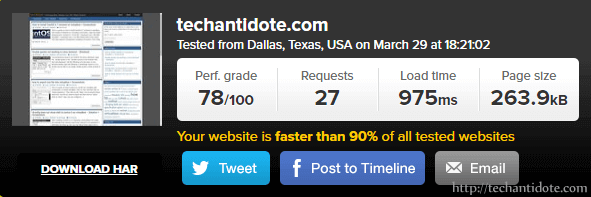
I ran some tests in Pindgom & found that load times could be improved. The fix was to remove query strings from static resources. Here is a screenshot before optimization:

before remove query strings from static resources - pingdom

I needed to improve the load time and the perf. grade score a bit more to improve SEO ratings.

There are many websites where you can perform a speed test of your website. I would recommend either of the following:

  1. Pingdom: http://tools.pingdom.com
  2. GTmetrix: http://gtmetrix.com

The above websites also provide a ‘Waterfall layout’ which displays the sequential order in which the elements are loaded(starting from the DNS query, the wait times, load times etc). I used pingdom instead of Gtmetrix as I was able to select the server location from which the test was being conducted which made it more flexible. Now, lets gets started!

[Disclaimer: Only attempt this if you know what you are doing and make sure you have a full backup of your website just incase something goes wrong.]

To remove query strings from static resources:

Add the following to your wordpress theme’s functions.php file and save it.

/*** Remove Query String from Static Resources ***/
function remove_cssjs_ver( $src ) {
 if( strpos( $src, '?ver=' ) )
 $src = remove_query_arg( 'ver', $src );
 return $src;
}
add_filter( 'style_loader_src', 'remove_cssjs_ver', 10, 2 );
add_filter( 'script_loader_src', 'remove_cssjs_ver', 10, 2 );

After adding the above code, I ran a speed test in pingdom to check if there was any performance improvement. As expected, the perf. grade score increased from 78/100 to 84/100 and the load time reduced to 286ms from 975ms. Yaay!!

after- remove query strings from static resources - pingdom

Also, note that if in the future you update your wordpress theme, the functions.php may also be updated/replaced. So you may need to verify and re-do this step again to make sure its persistent after the theme update.

There are plugins that do the same procedure to make things easier, but I prefer the manual way as installing a lot of plugins can slow down your website.

Have you optimized your wordpress site? Feel free to leave a comment below. Do subscribe for future updates. Happy Blogging!

[Source: Technumero, WordPress forums ]